So stellen Sie über Berichte in .NET Core eine Verbindung zu MS SQL her
One of the most common DBMS with which .NET developers work is MS SQL Server. In this article, we'll look at the way to use FastReport .NET reports in your .NET Core application with a connection to the MS SQL data source.
Firstly, you need to create a report with connection to MS SQL in the report designer, which is shipped with FastReport .NET.
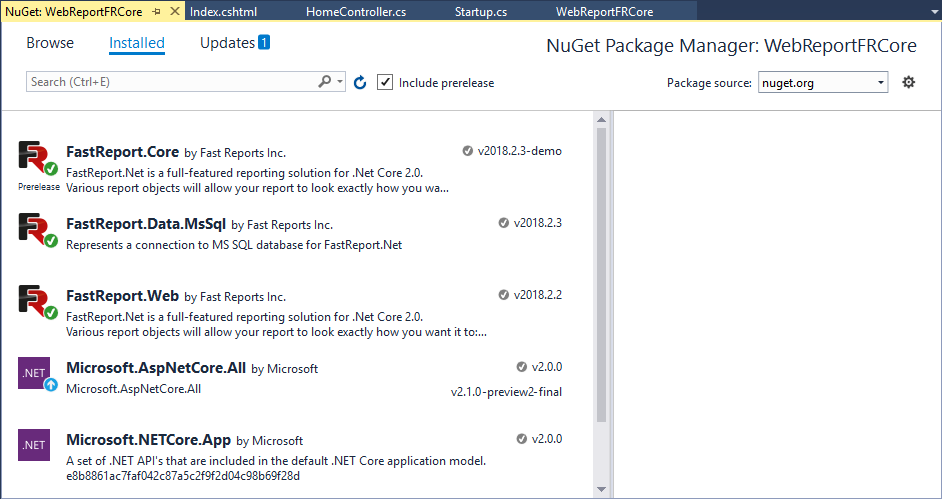
Then, in your .NET Core project, you need to add the FastReport libraries. You can do this in the Nuget Package Manager. We need to connect the following packages:
- FastReport.Core – library of the report generator adapted for the .Net Core platform;
- FastReport.Data.MsSql – connector to the database MS SQL;
- FastReport.Web – Web report object that allows you to display reports in the browser.
Then we go to the controller in which we will work with the report. In the example, this is the HomeController. You must add references to the following namespaces:
1 2 3 |
using FastReport.Web; using FastReport.Data; using FastReport.Utils; |
And add the code to create and load the report in the desired method. In the case this is Index:
1 2 3 4 5 6 7 8 9 10 11 12 13 14 |
public IActionResult Index() { RegisteredObjects.AddConnection(typeof(MsSqlDataConnection)); WebReport webReport = new WebReport(); MsSqlDataConnection sqlConnection = new MsSqlDataConnection(); sqlConnection.ConnectionString = "Data Source = localhost; AttachDbFilename =; Initial Catalog = testdb; Integrated Security = True; Persist Security Info = False; User ID =; Password = "; sqlConnection.CreateAllTables(); webReport.Report.Dictionary.Connections.Add(sqlConnection); webReport.Report.Load($@"Reports/CoreMSSQL.frx"); ViewBag.WebReport = webReport; return View(); } |
In the first line, we initialize the connection to the MsSqlDataConnection database. Then we create a web report object. We get an instance of the MsSqlDataConnection object and set the connection string to the database in it. After that we give the command - to build all the tables. And add the connection to the report. It only remains to load the report template into the web report object and transfer it to the view.
If the report has a variable, then we can pass it the value of the applications in such a way:
1 2 |
String value = "Products!"; webReport.Report.SetParameterValue("Param", value); |
In the Index.chtml view (depending on the controller), we add a line:
1 |
@await ViewBag.WebReport.Render();
|
Which will display the Web Report object.
The application is almost ready, you just need to add one more line of code to the Startup.cs file, in the Configure method:
1 |
app.UseFastReport();
|
Now you can run the application and check the operation of our report:
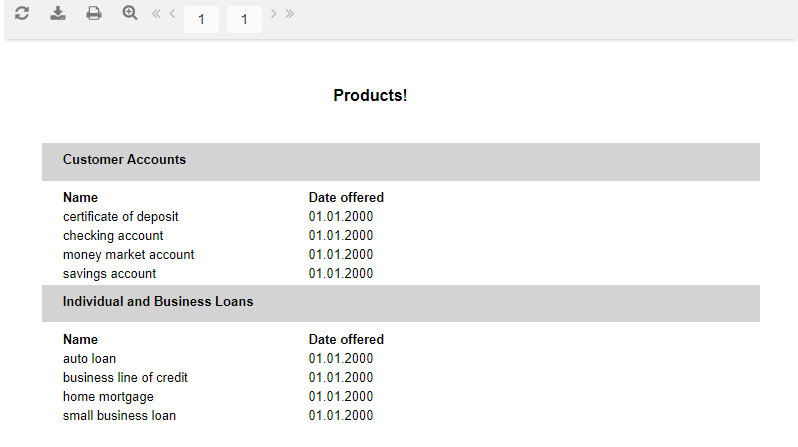
As you can see, the use of the connector, which we installed from Nuget, greatly facilitated our life. We just initialized the connection to the database. If we did not use MsSqlConnection, we would have to create a connection, a DataAdapter, a DataSet and register the data source in the report.