Verwendung des Konfigurators in FastReport Desktop
In this article I want to consider working with the Configurator, one of the programs of the FastReport Desktop complex. This program is designed to create special configuration files. They are instructions for the report builder, they specify actions with the report. Namely: export the report to various formats, save the report to a local disk or a remote server, send the report via email.
You can create such configurations and run them manually or with the help of a special task scheduler.
Let's look at the process of creating a configuration file. Run Configurator:
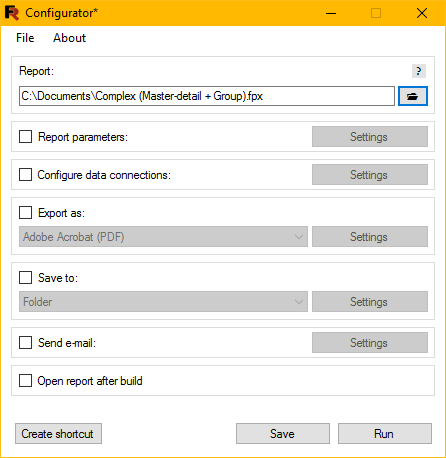
You can see a set of options for configuration. And the first of them is the "Report". To select it, use the icon with the folder on the right. This will show the standard open file window. I would like to draw your attention to the fact that you can select both a report template in the .fpx format and a report preview file in the .fpx format.
The next option is "Report Parameters". It allows you to specify the values of report parameters, if any.
![]()
We press the button "Settings", and we see the form - the list of parameters:
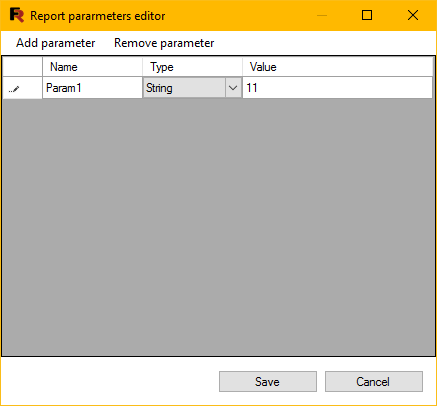
We can add and remove parameters with the corresponding buttons.
The "Configure data connections" option allows you to add several data sources for the report:
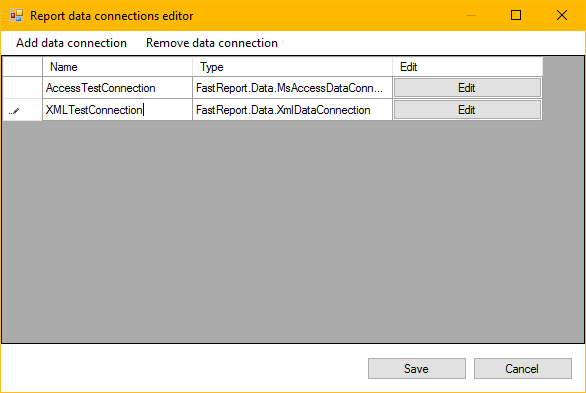
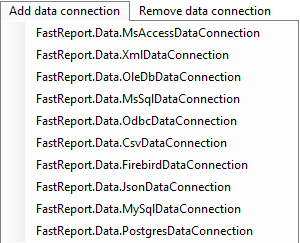
To add a connection, click the appropriate button and select the required data provider from the list:
To delete a connection, select it in the list and click the "Remove data connection" button.
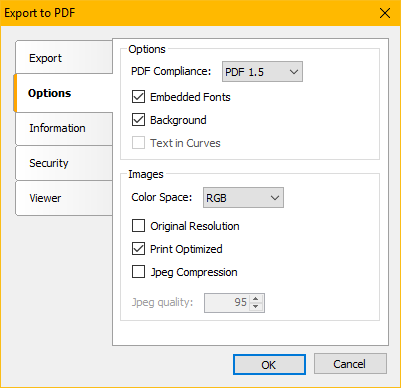
Next, we can enable the "Export" option. The report will be exported in the selected format. If you do not mark this option, the report will be saved, or sent by email (depending on selected action) in fpx format.

The settings for the selected export format are set in a separate window. You can call it up using the "Settings" button:
If you plan to save the report using the configuration, enable the "Save to" option and select the save location:
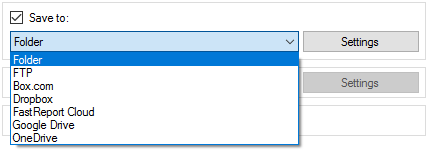
In the options settings, you specify the path or connection settings, if you chose cloud service or FTP.
For example, the settings for saving to a folder:
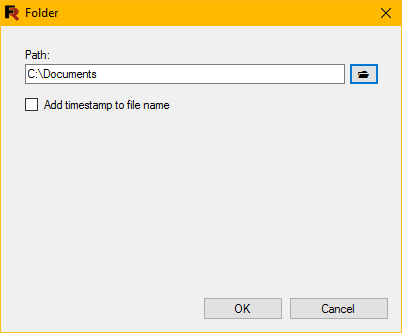
Interesting option "Add timestamp to file name". The date and time will be assigned. This is useful if you store multiple reports in one folder.
In the next step you can specify the settings for sending an email:
![]()
When this option is enabled, the e-mail sending settings window will be displayed.
For those who dealt with the sending of e-mails in FastReport .Net - everything is standard. Account settings for sending:
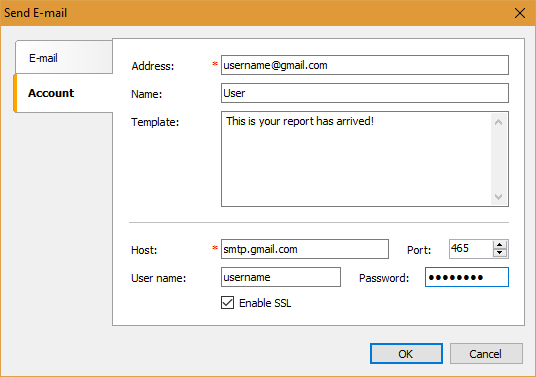
And the message itself:
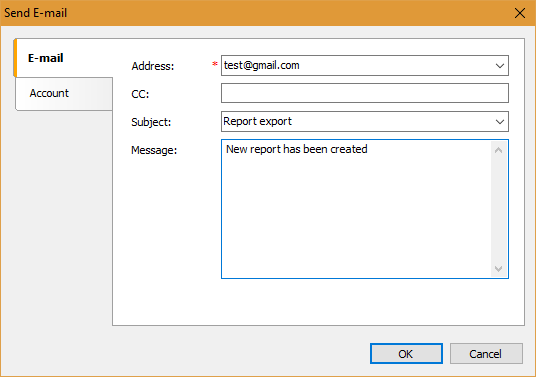
The report file (export, if selected) will be automatically attached to the message.
Well, the last option does not need a description:
![]()
Having adjusted the options you need, we press the "Save" button at the bottom of the main form. The standard file save dialog box is displayed. Next to the save button there is one more button - "Start". With it, you can run the configuration immediately, without creating a task in the scheduler.
The configuration file has the extension fcx, but it is essentially an xml document that can be opened with any text editor:
1 2 3 4 5 6 7 8 9 10 11 12 13 14 15 16 17 18 19 20 21 22 23 24 25 26 27 |
<?xml version="1.0" encoding="utf-8"?> <Config> <Report Path="C:\Documents\Complex (Master-detail + Group).fpx" /> <Parameters /> <Connections /> <Export As="pdf" /> <Save To="folder" Path="C:\Documents" Timestamp="True" /> <SendEmail Address="gromozekaster@yandex.ru" CC="" Subject="Test" MessageBody="" AccountAddress="gromozekaster@gmail.com" AccountName="Mail" AccountHost="smtp.gmail.com" AccountPort="465" AccountUserName="gromozekaster" AccountPassword="******" AccountMessageTemplate="" AccountEnableSSL="false" /> <OpenAfter /> </Config> |
As you have noticed, the structure of the file is quite simple. The root tags correspond to the options discussed above.
We created a configuration file, now let's talk about ways to use it:
1) Manual start from the Configurator. Here everything is simple, create a new one or open an existing configuration file and start using the button ![]() ;
;
2) Running from the command line of the Report Builder (included in the FR Desktop) with the configuration file that we created:"Builder.exe path/to/config.fcx".
Here we pass to the Builder a single parameter - the path to the configuration file;
3) Run the configuration file by job in the Scheduler (included in the FR Desktop).
If the first two options do not cause problems, the third needs to be considered:
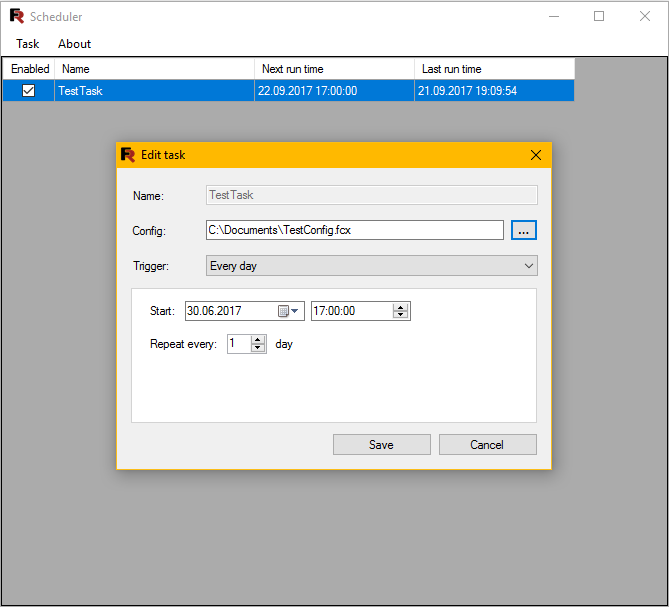
The scheduler is a typical scheduling program for scheduled tasks. The figures show the main parameters of the task: name, config and trigger. Depending on the value of the trigger, the time settings are changed. If this is a task for a single execution, then the date and time of operation are set. Time is also set for periodic tasks, daily or weekly. And for triggers "When you start the computer" and "When you log on to the system," no parameters are needed. That's all. When the task is fulfilled, the time of the last run will be indicated:
![]()
You can run the task immediately. Right click on the task and select "Run task now" from the context menu.
At the same time, the builder starts:
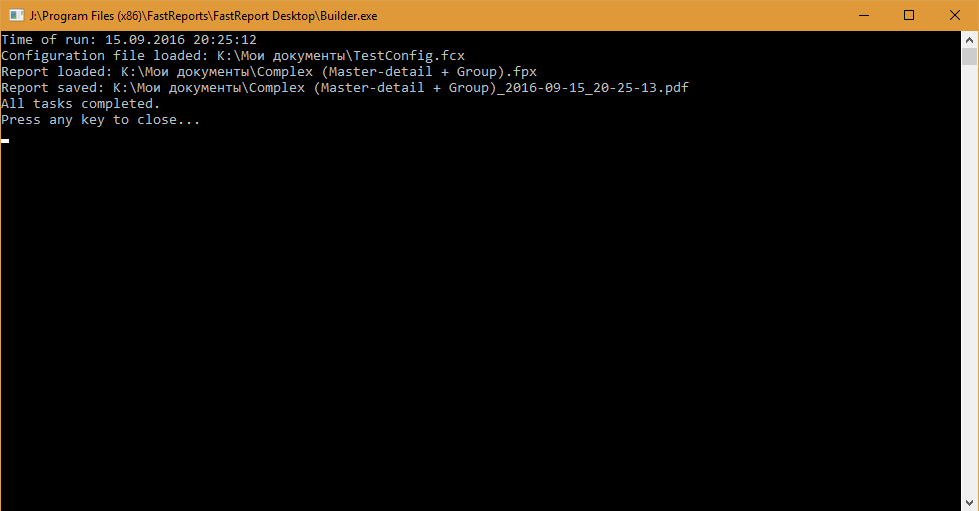
The results of the builder's work are shown on the command line.
We looked at the typical task of creating a configuration file and executing it. In fact, this is working with FR Desktop, except for directly creating reports, of course.
And finally. If you want to change the localization of the Configurator, open the file C: \ Program Files (x86) \ FastReports \ FastReport.Desktop \ settings.xml in the text editor. Replace the two symbolic designation of the localization to the one you need:
1 2 3 4 |
<?xml version="1.0" ?> <settings> <language>EN</language> </settings> |