How to use FastReport reports in a PHP application. Part 3
This is the final part of the article about using FastReport .NET in conjunction with a PHP application.
In previous articles, we looked at the way to create a server part on ASP.Net Core. Let me remind you that it allows you to get a report display, a report designer display with a report loaded into it for editing, to download reports in a given format.
Now we have to implement a php application. To do this, you must have a web server installed, for example, Apache and PHP installed on it.
We will not consider the principles of creating php applications as part of this article.
Let's just decide on the structure of the pages. We need 3 web page templates:
• Home - displays a web report;
• Designer - displays the report designer;
• Downloads - button to download the report.
Each page will have the same title with the menu. Therefore, it makes sense to put it in a separate file - header.php. Let's create it in the htdocs folder in the directory of preinstalled Apache.
1 2 3 4 5 6 7 8 9 10 |
<div id="header"> <div class="menu" > <h1>FastReports</h1> <ul > <li><a href="index.php">Home</a></li> <li ><a href="designer.php">Designer</a></li> <li ><a href="downloads.php">Downloads</a></li> </ul> </div> </div> |
Also, on each page there will be a drop-down list with reports and an action button. This module is also moved to a separate file - reportslist:
1 2 3 4 5 6 7 8 9 10 11 12 13 |
<?php $info = file_get_contents('https://localhost:44346/api/reports/'); $res = json_decode($info, true); ?> <div id="dropdown"> <select name="reports" id="reports" > <?php foreach ($res as $key => $value) { echo '<option value='.$key.'>'.$value['reportName'].'</option>'; } ?> <input type="button" name="submit" value="Get" onclick=get()'> </div> |
This uses the content retrieval method to load the list of reports in json format. The link points to the local debugging iis file, on which our server part is "raised". Next, using php code, we fill out the drop-down list using the data received from the server. The Get button launches the selected () function, which will be unique on each page.
We all know that usually the index.php file is used for the main page of a site. Let's create it.
1 2 3 4 5 6 7 8 9 10 11 12 13 14 15 16 17 18 19 20 21 22 23 24 25 26 |
<html> <head> <meta http-equiv="content-type" content="text/html; charset=utf-8" /> <title>FastReports</title> <meta name="title" content="FastReports" /> <link rel="stylesheet" href="stylesite.css" type="text/css" media="screen, projection" /> </head> <body> <div id="main"> <?php include ("header.php"); ?> <?php include ("reportslist.php"); ?> <script type="text/javascript" language="javascript"> function get(){ var name = document.getElementById('reports').options[document.getElementById('reports').value].text document.getElementById('forFrame').innerHTML = '<iframe id="frame" src="https://localhost:44346/api/reports/ShowReport?name='+name+'" width="1000" height="1000" />'; }; </script> <div id="forFrame"></div> </div> </body> </html> |
The page template includes a headline and body. The title, as usual, includes a title, meta data, a link to styles. In the body of the page, we included files with a header and a drop-down list. Remember that the Get button in the reportslist.php module calls the Get () function.
Let’s consider implementing this function in javascript. First of all, you need to get the name of the selected report, then to pass it as a parameter when calling the ShowReport method on the backend. To load an external object (WebReport) we will use the iframe tag. JavaScript again helps us dynamically insert ifame inside the <div> tag. In the link to the source we used a variable - the name of the report.
The stylesheet is also quite simple stylesite.css:
1 2 3 4 5 6 7 8 9 10 11 12 13 14 15 16 17 18 19 20 21 22 23 24 25 26 27 28 29 30 31 32 33 34 35 36 37 |
* { margin: 0; padding: 0; } #main{ background-color:#fff; width: 1000px; margin:0 auto; overflow:hidden; } #header { height:70px; background-color: #FFCC33; text-align: center; } #header li { list-style: none; display: inline; padding: 10px 20px 0px 10px; } #header li a { padding:3px; text-decoration: none; color: #000; } #header li a:hover { text-decoration: none; padding:3px; text-decoration: none; color: red; } #header H1 { font-family: Times, Tahoma, Arial,Verdana, sans-serif; } #dropdown { padding: 5px; } |
Let's start our web server and look at the index page:

We have a drop-down list and a button. Select the report and press the button:
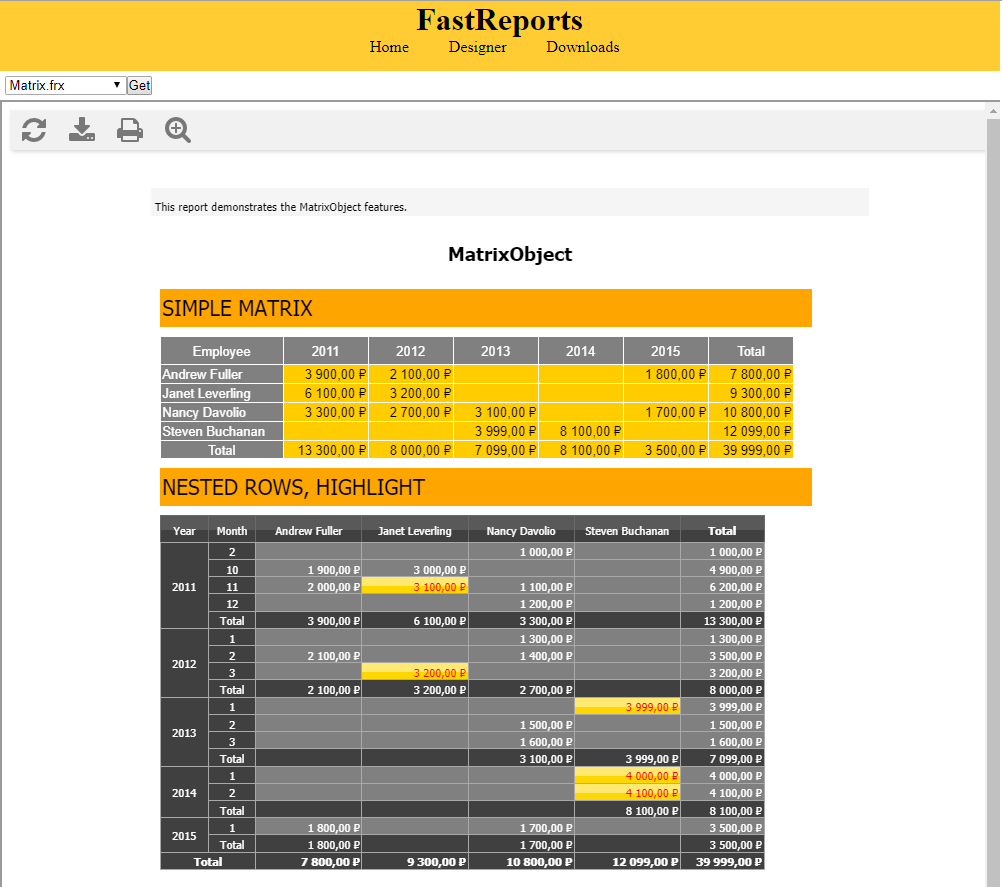
As a result, we get a web report object. Moreover, the buttons on the toolbar have not lost functionality - you can export to the desired format and print.
Now we implement the Dedigner.php page. Create it in the same directory with index.php:
1 2 3 4 5 6 7 8 9 10 11 12 13 14 15 16 17 18 19 20 21 22 23 24 25 26 27 28 |
<html> <head> <meta http-equiv="content-type" content="text/html; charset=utf-8" /> <title>FastReports</title> <meta name="title" content="FastReports" /> <meta name="keywords" content="" /> <meta name="description" content="" /> <link rel="stylesheet" href="stylesite.css" type="text/css" media="screen, projection" /> </head> <body> <div id="main"> <?php include ("header.php"); ?> <?php include ("reportslist.php"); ?> <script type="text/javascript" language="javascript"> function get(){ var name = document.getElementById('reports').options[document.getElementById('reports').value].text document.getElementById('forFrame').innerHTML = '<iframe id="frame" src="https://localhost:44346/api/reports/Design?name='+name+'" width="1000" height="1000" />'; }; </script> <div id="forFrame"></div> </div> </body> </html> |
As you can see, the html page template is no different from index.php. The only difference is in the Get () method. We get the name of the report selected in the drop-down list. Then, insert the iframe with a reference to the Design method on the backend. In the parameter we pass the name of the report. As a result, we will see a page similar to index:

But, if we click on the Get () button:
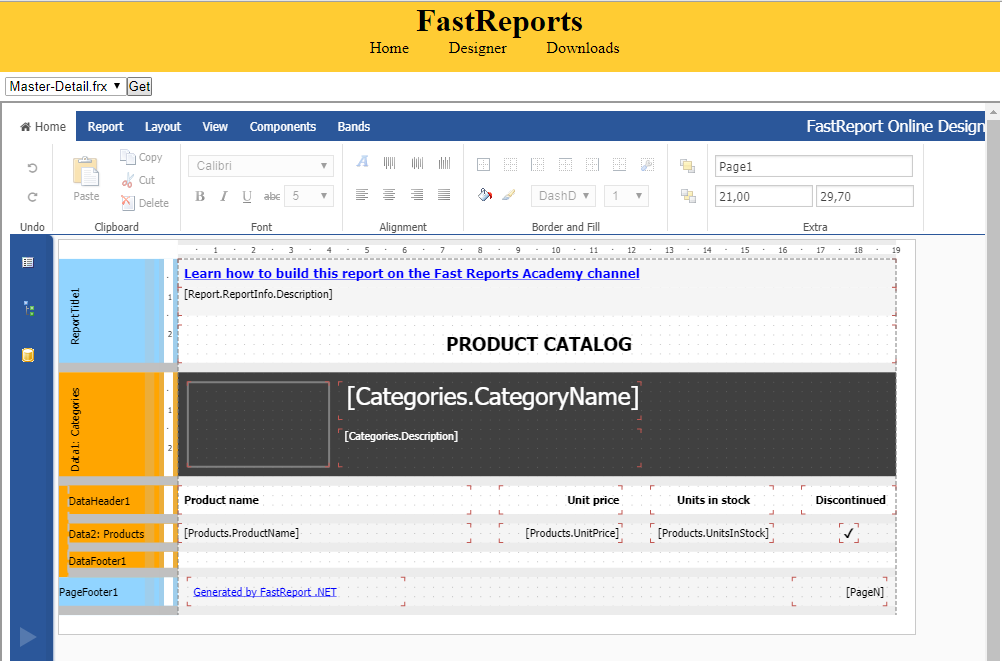
... we get a designer with a loaded report template. We can edit it and save:
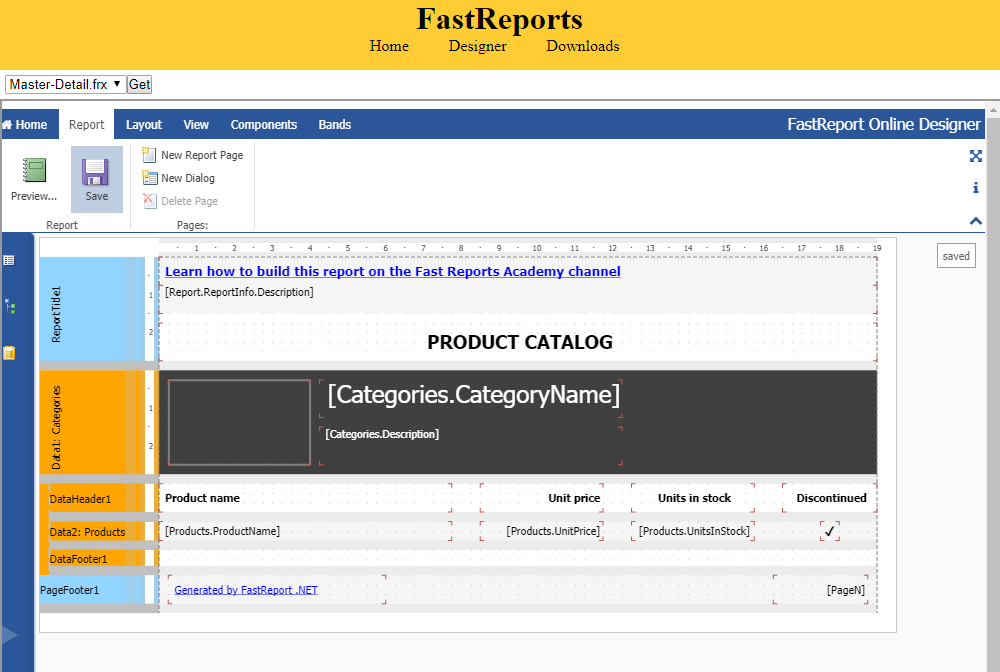
The saved message in the green frame will tell us that the report is saved.
It remains to implement the third page - Downloads. Create the file downloads.php:
1 2 3 4 5 6 7 8 9 10 11 12 13 14 15 16 17 18 19 20 21 22 23 24 25 26 27 28 29 30 31 32 33 34 35 36 37 38 39 40 41 42 43 44 45 46 47 48 49 50 51 52 |
<html> <head> <meta http-equiv="content-type" content="text/html; charset=utf-8" /> <title>FastReports</title> <meta name="title" content="FastReports" /> <meta name="keywords" content="" /> <meta name="description" content="" /> <link rel="stylesheet" href="stylesite.css" type="text/css" media="screen, projection" /> </head> <body> <div id="main"> <?php include("header.php"); ?> <?php include("reportslist.php"); ?> <p>Please select report format:</p> <div> <input type="radio" id="pdf" name="r" value="pdf"> <label for="pdf">pdf</label> <input type="radio" id="html" name="r" value="html"> <label for="html">html</label> </div> <script type="text/javascript" language="javascript"> function get(){ var number = document.getElementById('reports').value; number++ var type = ''; if (number > 0) { var inp = document.getElementsByName('r'); for (var i = 0; i < inp.length; i++) { if (inp[i].type == "radio" && inp[i].checked) { type = inp[i].value; } } var elem = document.createElement('a'); elem.setAttribute('href','https://localhost:44346/api/reports/'+number+'?format='+type); elem.setAttribute('download', 'download'); elem.click(); } } </script> </div> </body> </html> |
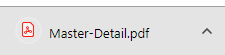
The page template in addition to the drop-down list contains two radio buttons: pdf, html. These are the two types of exports that we implemented on the backend. The Get () method this time is significantly different. Instead of the name, we get the index of the report selected in the drop-down list. In the script, we create the <a> tag and set the link to the backend, where using WebApi we get the report on the index in the specified format. After forming the link, we immediately click on it programmatically. Thus we download the file. Here's how it works:

Click Get button. And we get the file:
You could display the report in the WebReport object, as on the first page, and then do the export. The Downloads page shows an alternative method of obtaining report export - directly from the server.
This concludes the 3-part article on working with FastReport.Net reports from a PHP application.