How to use FastReport Core Web Report with ReactJS
The FastReport. Core Report Generator is designed to work with the popular .Net Core framework. He gained even more popularity thanks to the compatibility with trend web frameworks and libraries such as Angular, React, Vue. Therefore, many FastReport users would like to use reports in their Web applications written in the above libraries. In another article we have already considered how to display reports in a single-paged application based on Angular. Now let's look at the example of using FR. Core in the application on ReactJS.
To work with the React library, you need to install the Node JS program platform, which allows you to run JavaScript code on the server side. Also, with it will be installed Package Manager NPM, which allows you to install various Java Script packages that you need for development.
Next, you need the .Net Core SDK 2.0. But if you are developing on MS Visual Studio 2017, you have already installed this SDK.
To create a project on React, you only need to run one command at the Windows command prompt. But first you need to open the folder (command CD) in which you want to create a project. Creating a project.
dotnet new react –o FRCoreWebReportReact
As you guessed FRCoreWebReportReact is the name of the future project. Now open the FRCoreWebReportReact. csproj file.
Add FastReport packages in the NuGet Manager:
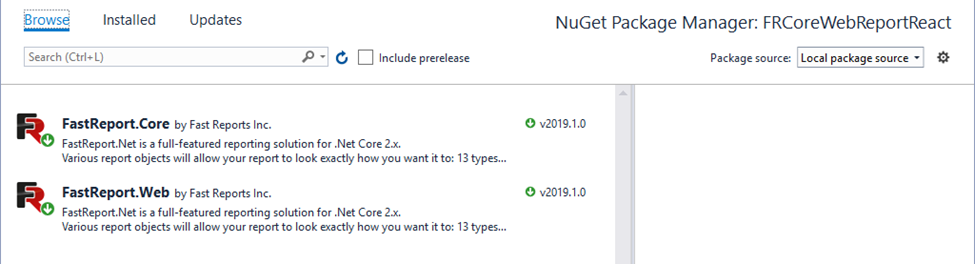
These packages are located in the folder with installed FastReport.Net:
C:\Program Files (x86)\FastReports\FastReport.Net\Nugets
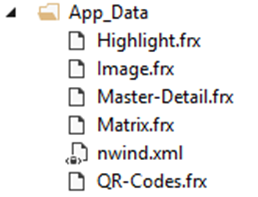
The next thing to do is to add the App_Data folder to the project. From the delivery of FastReport.Net we can take several report templates and XML database for them.
Let's add one more folder to the root of the project – Views. It will store the views we'll talk about later.
Now let's start developing the backend of the application. There is already one in the Controllers folder – SampleDataController. Let's create our own, named ReportController:
1 2 3 4 5 6 7 8 9 10 11 12 13 14 15 16 17 18 19 20 21 22 23 24 25 26 27 28 29 |
using System; using Microsoft.AspNetCore.Mvc; using FastReport.Web; namespace FRCoreWebReportReact.Controllers { [Route("api/[controller]")] public class ReportController : Controller { [HttpGet("[action]")] public IActionResult DisplayReport(string name) { WebReport WebReport = new WebReport(); WebReport.Width = "1000"; WebReport.Height = "1000"; //Load report into the object WebReport WebReport.Report.Load(String.Format("App_Data/{0}.frx", name)); //Create Data source System.Data.DataSet dataSet = new System.Data.DataSet(); //Open Data base xml dataSet.ReadXml(@"App_Data/nwind.xml"); //Register data source in the object WebReport.Report.RegisterData(dataSet, "NorthWind"); //Send report to View ViewBag.WebReport = WebReport; return View(); } } } |
There is only one method in the controller – loading the report template into a Web report object and displaying it in the view. The DisplayReport method accepts the name parameter - the report's title.
Now, for this Web method, you need to create a view. Right click on the method name and select AddView:
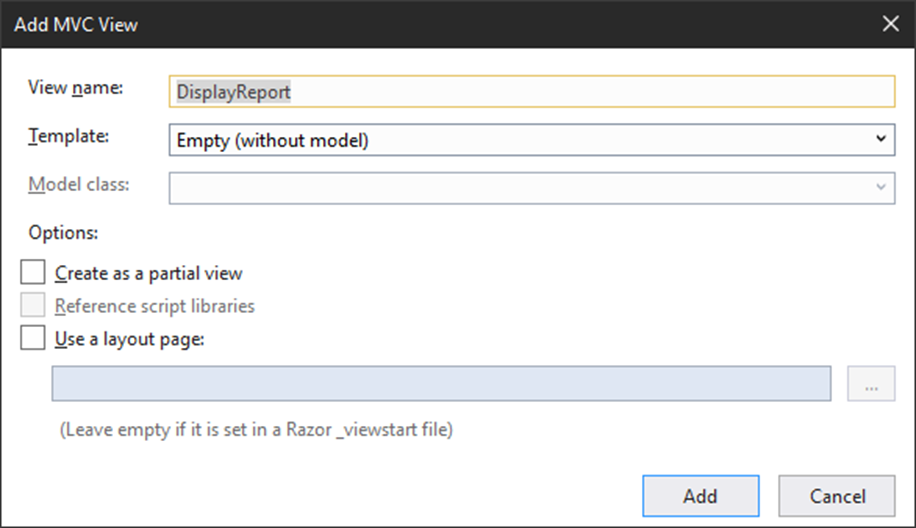
Another folder – Report - will be automatically added to the folder Views, and there will be DisplayReport view. Replace the contents of the view using this code line:
1 |
@await ViewBag.WebReport.Render()
|
The only thing left to do in the server-side of the application is to edit the Startup.cs file. In the Configure method, add the line:
1 |
app.UseFastReport();
|
Go to the client side of the application on ReactJS.
In Solution Explorer, locate the ClientApp directory and expand it. Then we open src and components.
Let's create a new Report.js file in this folder:
1 2 3 4 5 6 7 8 9 10 11 12 13 14 15 16 17 18 19 20 21 22 23 24 25 26 27 28 29 30 31 32 33 34 35 36 37 38 39 40 41 42 43 44 45 46 47 48 49 50 51 52 53 54 55 56 57 58 59 60 61 62 63 64 65 66 67 |
import React, { PureComponent, Fragment } from 'react'; export class Report extends PureComponent { constructor(props) { super(props); this.state = { options: [ { value: '-- Select report name --', }, { value: 'Matrix', }, { value: 'Master-Detail', }, { value: 'QR-Codes', }, { value: 'Highlight', }, { value: 'Image', } ] }; } handleChange = (event) => { this.setState({ value: event.target.value }); this.name = event.target.value; } static createMarkup(name) { return { __html: '<iframe height="1000" width="1000" src="api/Report/DisplayReport?name=' + name + '" />' }; } static getReport(name) { return ( <div dangerouslySetInnerHTML={Report.createMarkup(name)} /> ) } render() { const { options, value } = this.state; let contents = this.name ? Report.getReport(this.name) : <div />; return ( <div> <div> <Fragment> <select onChange={this.handleChange} value={value}> {options.map(item => ( <option key={item.value} value={item.value}> {item.value} </option> ))} </select> </Fragment> </div> {contents} </div> ); } } |
This component represents the page that will display the report. In the class constructor, we declared an array of options that contains the names of the reports. The onChange-handleChange event handler is then implemented. In it we specify the element of the options array and the value of the variable name, which will be passed to the server to generate the selected report.
Static methods of createMarkup and getReport should be considered together. The first one creates a IFRAME whose data source is the DisplayReport view which we implemented earlier. The second is to convert the HTML code from createMarkup into a secure one, which allows you to embed it in the DOM.
Render () function contains the markup code that will be displayed on the page. Here we create a variable contents, which will take the result as the value getReport function when you select the report name in the drop-down list. Otherwise, nothing will be displayed.
Note the <select> element. This list is populated from an array of options. When you select a list item onChange event occurs and handleChange function will be executed.
Now add this component in the navigation menu NavMenu.js file:
1 2 3 4 5 6 7 8 9 10 11 12 13 14 15 16 17 18 19 |
<Navbar inverse fixedTop fluid collapseOnSelect> <Navbar.Header> <Navbar.Brand> <Link to={'/'}>FRCoreWebReportReact</Link> </Navbar.Brand> <Navbar.Toggle /> </Navbar.Header> <Navbar.Collapse> <Nav> … <LinkContainer to={'/report'}> <NavItem> Report </NavItem> </LinkContainer> … </Nav> </Navbar.Collapse> </Navbar> |
Now let’s add Report component to App.js:
1 2 3 4 5 6 7 8 9 10 11 12 13 14 |
import { Report } from './components/Report'; export default class App extends Component { displayName = App.name render() { return ( <Layout> … <Route path='/report' component={Report} /> … </Layout> ); } } |
Now let’s run the application:
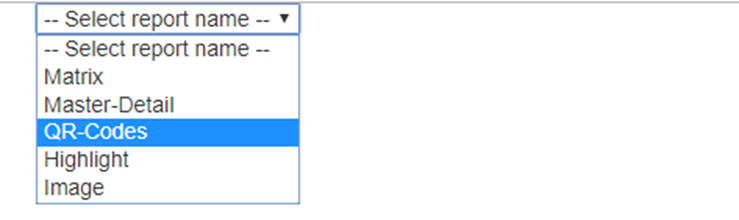
At first the page is empty, only the drop-down list is available. Choose a report from it:
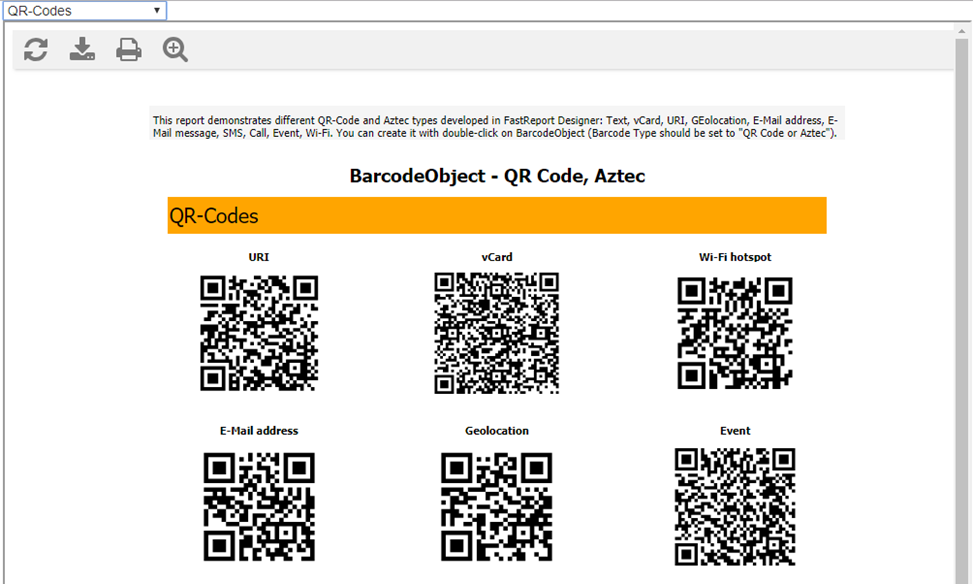
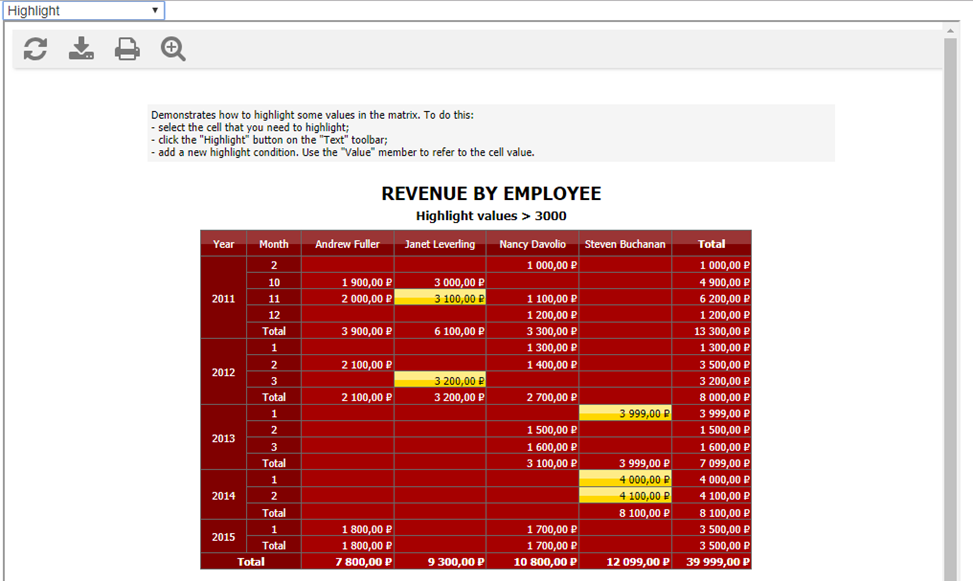
And now choose another report:
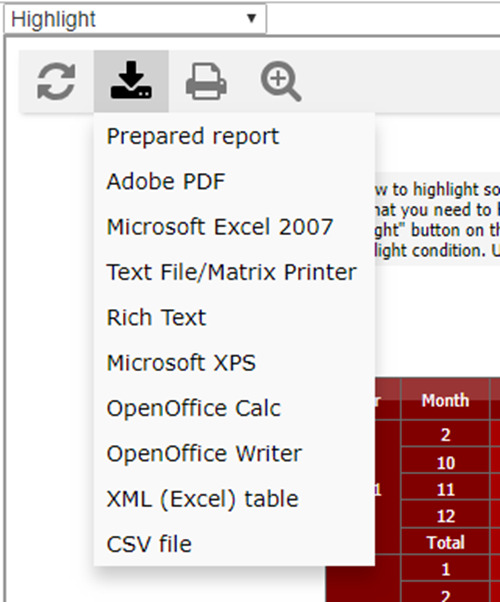
In conclusion, let's say that our goal is achieved – FastReport reports are displayed in an application written in the React library. Moreover, all the buttons in the Web Report Control Panel have saved functionality, for example, export. Choose Export to Microsoft Excel 2007:
And we get the file:
![]()