Saving report in cloud services from a user application code
You are not only available report exports, but also some options for saving the report, for example, into Box, into DropBox, into Google Drives and others. In the menu "Save" allocated a special section with options for saving the report in a variety of cloud services:
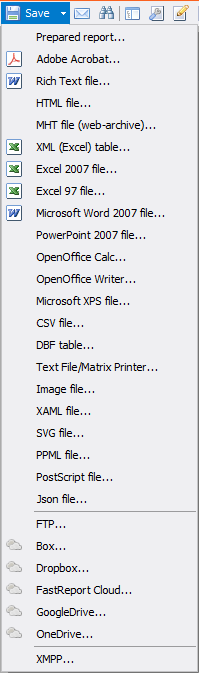
We are available:
1) Box;
2) Dropbox;
3) FastCloud;
4) GoogleDrive;
5) OneDrive;
6) XMPP.
The latter option uses the FastCloud cloud service for storing and building reports. The XMPP protocol sends a link to the report to the jabber client. Using these save options is not difficult if you manually set the preferences in preview mode. But how to automate the process of saving, using code?
This will be discussed in this article.
With the exception of FastCloud, all cloud services use OAuth-type authorization. This is an authorization protocol that allows you, without using a real login and password from the service, to give the application access to the cloud service. However, you can restrict access rights. You will be given an identifier and a secret key that you need to use for authorization.
To get the Client Id and the Client Secret, you need to create the application and register it on the OAuth server of your cloud service.
Therefore, we need to specify at least two parameters to save the report to the cloud service. Let’s consider in order.
1) For the Box service:
First of all, you need to add the FastReport library:
using FastReport;
We create an instance of the ClientInfo class, which will contain information for authorization:
1 2 |
FastReport.Cloud.StorageClient.SkyDrive.ClientInfo clientInfo = new FastReport.Cloud.StorageClient.SkyDrive.ClientInfo("ClientName", "ClientId", "ClientSecret"); |
ClientInfo can take three parameters: ClientName, ClientId and ClientSecret. In our case, ClientId and ClientSecret are required. Then create a GoogleDrive client to save the report:
1 2 |
FastReport.Cloud.StorageClient.GoogleDrive.GoogleDriveStorageClient client = new FastReport.Cloud.StorageClient.GoogleDrive.GoogleDriveStorageClient(clientInfo); |
Create a report object and load the report into it:
1 2 |
Report report = new Report(); report.Load(@"C:\Program Files (x86)\FastReports\FastReport.Net\Demos\Reports\Text.frx"); |
If you want to save the report in a format other than native fpx (the format of the report preview), you need to create an export instance:
1 |
FastReport.Export.Pdf.PDFExport pdf = new FastReport.Export.Pdf.PDFExport();
|
Save the report using the client:
1 |
client.SaveReport(report, pdf);
|
If you save a report in the fpx format, you can pass null instead of the second parameter:
1 |
client.SaveReport(report, null);
|
2) For the DropBox is slightly different. Within OAuth, you can also use access token. This is an access key that is generated as a result of successful authorization. Passing such a token, we seem to restore the previous authorization. Create a client for the DropBox and pass it access token in text format:
1 2 |
FastReport.Cloud.StorageClient.Dropbox.DropboxStorageClient drop = new FastReport.Cloud.StorageClient.Dropbox.DropboxStorageClient("accessToken"); |
Proxy settings:
1 2 3 4 5 |
drop.ProxySettings.Server = ""; drop.ProxySettings.Port = 999; drop.ProxySettings.ProxyType = FastReport.Cloud.ProxyType.Http; drop.ProxySettings.Username = "Username"; drop.ProxySettings.Password = "Password"; |
Next, as in the previous example:
1 2 |
Report report = new Report(); report.Load(@"C:\Program Files (x86)\FastReports\FastReport.Net\Demos\Reports\Text.frx"); |
Save the report:
1 |
drop.SaveReport(report, null);
|
3) For the GoogleDrive:
Proxy settings if needed:
1 2 3 4 5 |
client.ProxySettings.Server = ""; client.ProxySettings.Port = 999; client.ProxySettings.ProxyType = FastReport.Cloud.ProxyType.Http; client.ProxySettings.Username = "Username"; client.ProxySettings.Password = "Password"; |
Create a report:
1 2 |
Report report = new Report(); report.Load(@"C:\Program Files (x86)\FastReports\FastReport.Net\Demos\Reports\Text.frx"); |
Create export:
1 |
FastReport.Export.Pdf.PDFExport pdf = new FastReport.Export.Pdf.PDFExport();
|
Save the report:
1 |
client.SaveReport(report, pdf);
|
4) For the OneDrive:
1 2 3 4 |
FastReport.Cloud.StorageClient.SkyDrive.ClientInfo clientInfo = new FastReport.Cloud.StorageClient.SkyDrive.ClientInfo("ClientName", "ClientId", "ClientSecret"); FastReport.Cloud.StorageClient.SkyDrive.SkyDriveStorageClient one = new FastReport.Cloud.StorageClient.SkyDrive.SkyDriveStorageClient(clientInfo); |
Proxy settings if needed:
1 2 3 4 5 |
one.ProxySettings.Server = ""; one.ProxySettings.Port = 999; one.ProxySettings.ProxyType = FastReport.Cloud.ProxyType.Http; one.ProxySettings.Username = "Username"; one.ProxySettings.Password = "Password"; |
Create a report:
1 2 3 |
Report report = new Report(); report.Load(@"C:\Program Files (x86)\FastReports\FastReport.Net\Demos\Reports\Text.frx"); one.SaveReport(report, null); |
5) For FastCloud there are differences. It does not use the OAuth protocol. Authorization is carried out by email address and password. Create a FastCloud client:
1 2 |
FastReport.Cloud.StorageClient.FastCloud.FastCloudStorageClient fast = new FastReport.Cloud.StorageClient.FastCloud.FastCloudStorageClient(); |
Assign a token. To generate a token, use the GetAccessToken method:
1 |
fast.AccessToken = fast.GetAccessToken("email@mail.com", "password");
|
Create an instance of the export:
6) Send the report to Jabber (XMPP). Previously, we need to create an xmpp client:
1 2 |
FastReport.Messaging.Xmpp.XmppMessenger messenger = new FastReport.Messaging.Xmpp.XmppMessenger("user@xmpp.jp", "password", "user@xmpp.jp"); |
If you need to configure Proxy:
1 2 3 4 5 |
messenger.ProxySettings.Server = "server"; messenger.ProxySettings.Port = 999; messenger.ProxySettings.ProxyType = FastReport.Cloud.ProxyType.Http; messenger.ProxySettings.Username = "username"; messenger.ProxySettings.Password = "password"; |
Then, or before, create a report object:
1 2 |
Report report = new Report(); report.Load(@"С:\Program Files (x86)\FastReports\FastReport.Net\Demos\Reports\Text.frx"); |
And we pass it to xmpp client:
1 |
messenger.SendReport(report, null);
|
Having executed this code, we send the report to the cloud service FastCloud. At the same time, the jabber user receives a message with a link to the report. The link in the xmpp client looks like this:
https://cloud.fast-report.com/reports/3da0fcd3f76ac1f6d87c21df85f5d5e2