How to create a ZPL file in Delphi/ C++ Builder/Lazarus
What is a ZPL file?
 ZPL stands for Zebra Programming Language. It allows team to create the desired print design for any label or page.
This makes the label independent from the specific printing device. The printer receives commands to produce shapes, frames, symbols and other things, and itself knows how to do it. This is the key difference of ZPL!
Zebra Technologies originally invented the ZPL to create and print labels (with barcodes, graphics, and any text) that are used primarily for commercial activities.
Briefly about steps of creating a ZPL:
First, data is sent to the printer using the equipment (PCs or terminals that collect the information), then the Zebra-printer processor processes the information received and prints the result.
Briefly about writing ZPL code:
Measurements for printing are made in points, because without an exact value it will be quite difficult to do something without receiving errors and failures. You should study the documentation of the printing equipment and find out what its density of pixels (DPI) is.
The design itself is created with the following commands:
1. The code should start with the ^ XA tag, and end with ^ XZ;
2. But the ^ FX tag precedes comments;
3. ^ CF x, y, z - default font settings: the font, its height and width;
4. ^ FO x, y - left and top indents;
5. ^ FS - end of line;
6. You can display the data with the adjusted values as follows:
FD <text>
Block of text:
FB <width>, <number of lines>, <spaces between lines>, <text alignment>, <indentation for the second or subsequent line>
<text position>:
L - left-aligned,
R – right-aligned,
C - in the center,
J - align the text to the width of the field;
Creating rectangles:
GB <width>, <height>, <line thickness>, <line color>, <corner rounding>
Line color: B (black) or W (white)
Corner rounding is indicated by a value from 0 to 8.
7. Barcode (both ZPL and Zebra-printer - created directly for barcodes!) consisting of three commands:
barcode dimensions (BY <width>, <line thickness ratio>, <barcode height>);
its settings:
BC <orientation>,
<barcode height in points>,
<whether to print the decryption of the code>,
<barcode decoding>,
<mode> <orientation> - N - normal orientation;
R - 90 degrees clockwise;
I - 180 degrees;
B - 270 degrees;
<whether to print the decryption of the code>,
<decoding of the code above the barcode> - Y (yes) or N (no) values;
<mode> - default N.
8. The output of the barcode for printing is carried out through the FD <information> command.
In fact, everything is not that simple, but it gives a general idea of the ZPL language.
Creating a ZPL in Delphi / C++Builder / Lazarus
So is it possible to send just an ordinary picture or a “created to fit the label” document from a text editor? Can we just “draw on Canvas, send to the printer” and let the driver figure it out by itself? Yes, you can send, it will be printed, and it will often look like a real one. The only problem is that ZPL and Zebra-printers are designed primarily to create machine-readable vector-scaled labels, and often the result, due to the rasterization and image scaling steps in the program / driver will not be readable by the barcode scanner. If your barcodes are not recognized by the scanner then, usually, you have a problem with a rasterized and scaled image. So let’s create a ZPL from our Delphi or Lazarus application correctly!
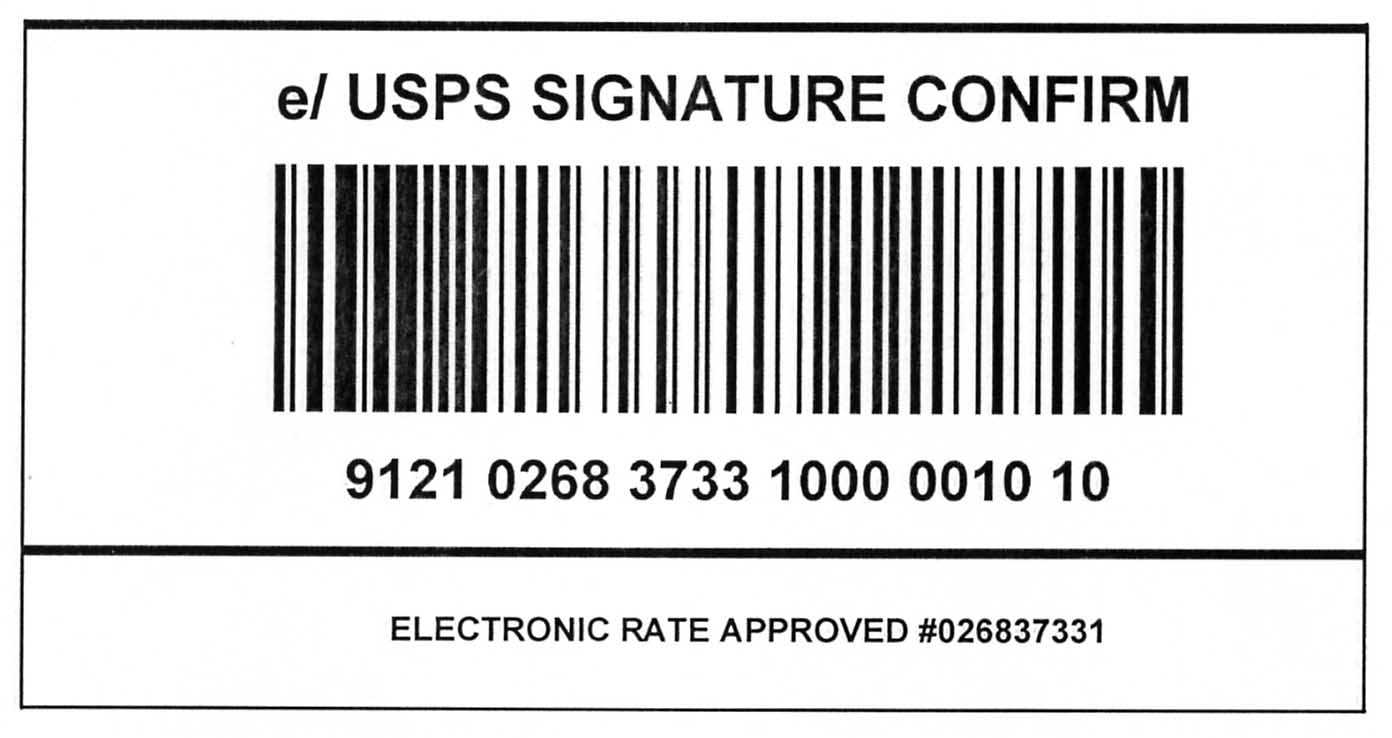
We will use the FastReport VCL platform, since it saves from Delphi immediately to the required format (Zebra Programming Language). But we can use more possibilities - add pictures, tables, barcodes (and these will be correct, machine-readable barcodes!). It is clear that it makes no sense to send photos of landscapes to a “zebra-printer”, but a picture like the one at the beginning of the article - why not, if it is appropriate on our labels!)
There are two options for saving the generated report. The first is saving through the preview window, and the second is directly through the Pascal code.
Let's consider both options.
Get to work! We do not only add the form components we need to create a report and connect data sources, but also a component for ZPL export!
Saving a ZPL from Delphi / RAD Studio Lazarus from preview
The advantage of this method is that we see what we are saving, we have the opportunity to compare the preview with the result in ZPL. And we debug it on our computer (instead of using our hapless victim’s equipment) when the project seems to be ready.
Create the document.
Before saving, look at it in the preview window, edit everything that you do not like.
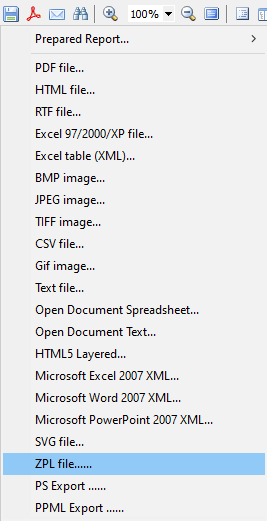
Click on “Save” button.
Choose “ZPL file”. I am writing this article with almost all export filters connected. In your case (if you have ONLY the ZPL export filter connected) there will be no any other items (except Prepared Report) in this menu.
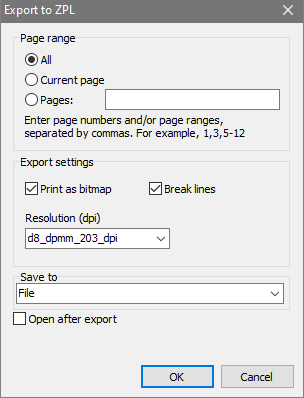
More about the settings:
Page range – range of pages to save;
Export Settings:
- Print As Bitmap - print as a matrix image (DO NOT do this for barcodes);
- Break lines - broken lines;
- Resolution (dpi) - resolution from 152 to 600 dpi (in fact, there is a set of preset values, limited formats - we can select them - they are listed below in the code);
Save to - saving as a file on a PC, sending by mail or to the cloud storage;
Open after export - opening after saving.
Saving a ZPL from Delphi / C++Builder / Lazarus code
| Export to ZPL: | |
1 2 3 4 5 6 7 8 9 10 11 12 13 14 15 16 17 18 19 20 21 22 23 24 25 26 |
procedure TForm1.Button18Click(Sender: TObject); begin {Generate a report. The report must be generated before exporting} frxReport1.PrepareReport(); {Set the range of pages to export. By default, all pages of the generated report are exported} frxZPLExport1.PageNumbers := '2-3'; {Set whether to export the report as an image} frxZPLExport1.PrintAsBitmap := True; {Set whether a sequence of end-of-line characters is needed at the end of each line} frxZPLExport1.BreakLines := True; {Set resolution. Possible values: d6_dpmm_152_dpi, d8_dpmm_203_dpi, d12_dpmm_300_dpi, d24_dpmm_600_dpi, test1to1} frxZPLExport1.ZplDensity := d6_dpmm_152_dpi; {Set whether to open the resulting file after export} frxZPLExport1.OpenAfterExport := False; {Set whether to display export progress (show which page is currently being exported)} frxZPLExport1.ShowProgress := False; {Set whether to display the export filter settings dialog box} frxZPLExport1.ShowDialog := False; {Set the name of the resulting file.} {Please note that if you do not set the file name and disable the export filter dialog box,} {the file name selection dialog will still be displayed} frxZPLExport1.FileName := 'C:\Output\test.zpl'; {Export the report} frxReport1.Export(frxZPLExport1); end; |
As you can see, creating and printing Zebra labels from Delphi (in Windows applications) and from Lazarus (Linux application) is quite simple. This method is used in millions of retail outlets around the world.
