Interactive web report with outline and bookmark
Interactive reports allow users to interact with them. For example, a report can contain hyperlinks, bookmarks and an outline. By clicking on the section title in the content you move to a bookmark in the desired location of your report. These reports are often used in catalogs.
Let us create an interactive report for the Web. For this, we need a report template and a web application.
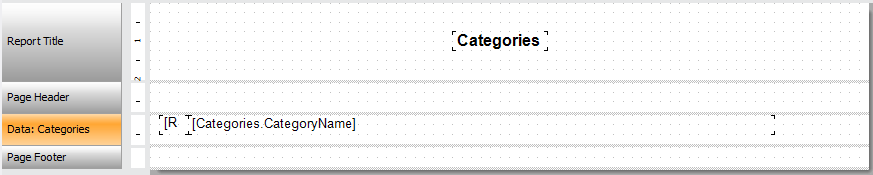
We can begin with the report. Its template will consist of two pages - a content and a data page. For example, I used a database of "nwind.xml FastReport.Net" delivery.
So, we use a table "Categories and Products". I have created a simple template with a field "Categories.CategoryName".
By clicking on a category a user will move to the appropriate section. We will overview this feature later.
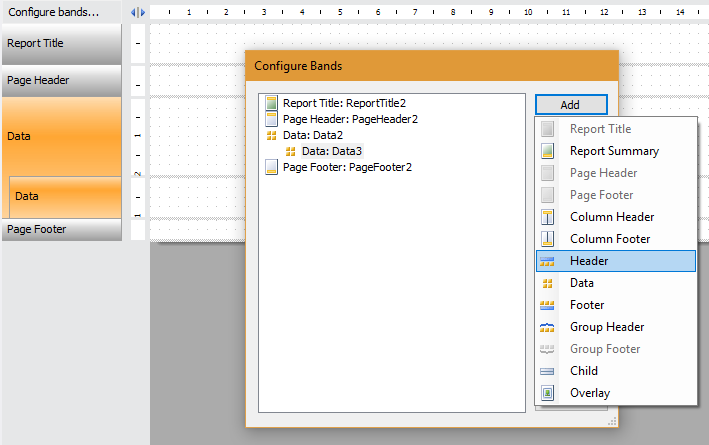
Now let us create the second page of the report ![]() . Here the band "Data" contains a detailed band. To add it, use the right click on the band "Data" and choose from the list of “Add Detail Data Band”.
. Here the band "Data" contains a detailed band. To add it, use the right click on the band "Data" and choose from the list of “Add Detail Data Band”.
For a detailed data band you need to add the header band. To do this, press the button “Configure bands ...”. In the appeared window select a detailed band "Data" and click "Add» (Add). Choose the band “Header”:
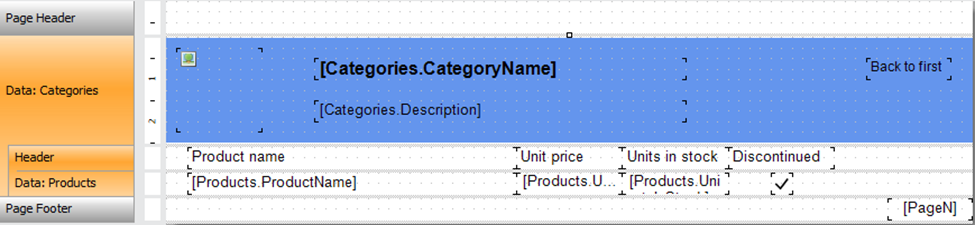
Drag fields to the main band “Data”: Categories.CategoryName, Categories.Description, Categories.Picture.
I would also like to add a link to the first page of the report. The template looks like this:
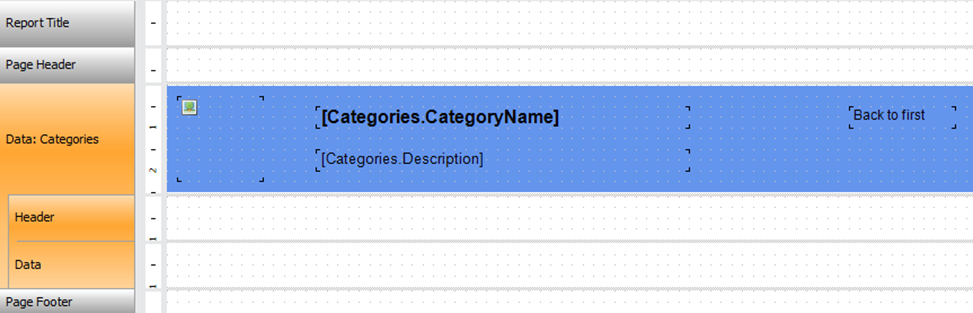
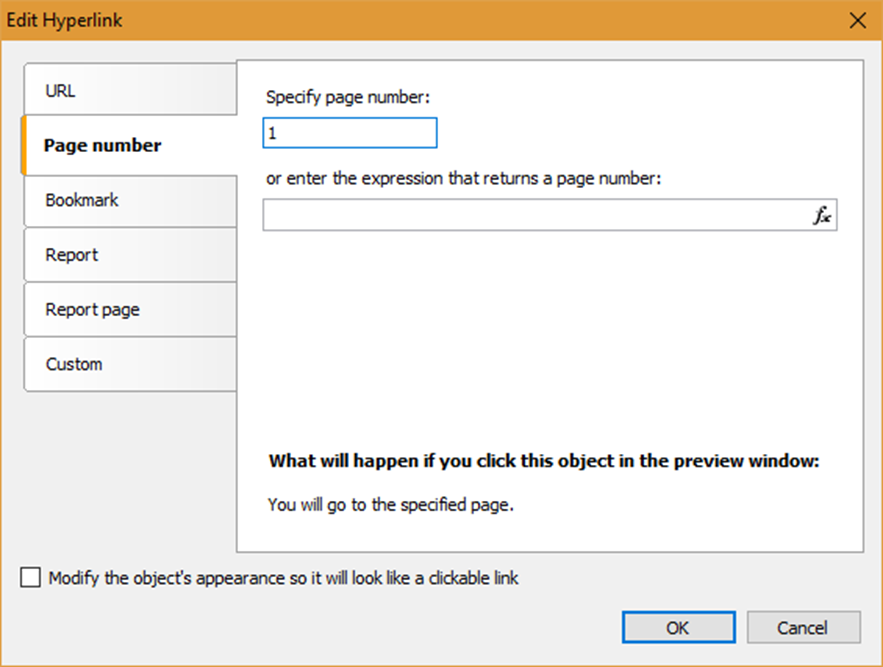
For label "Back to first" add a hyperlink. Do a right click on this label and choose "Hyperlink". In the editor, choose Hyperlink tab “Page Number” and set the value 1:
Now we get a detailed band "Data". Drag the fields from the "Product" table to it:
ProductName, UnitPrice, UnitsInStock, Discontinued. The template page looks like this:
To navigate through the tabs and the formation of the content, we need to set some properties of the first data band. So, select the band. In the Property inspector find "OutlineExpression". Enter the value - [Categories.CategoryName]. Just above the property there is a Bookmark. Set the same value for it.
For a detailed band "Data" we set Outline property - [Products.ProductName].
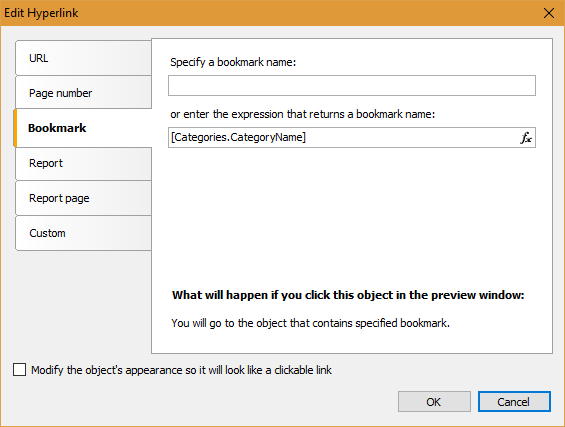
Now back to the first page. For the field "Categories.CategoryName" we define "Hyperlink" property. In the "Hyperlink" editor, choose tab “Bookmarks” and set the expression [Categories.CategoryName]:
Now, I would like to display the page numbers next to each category name. Add a text box next to the category name and set the following text:
[Engine.GetBookmarkPage([Categories.CategoryName])]
This function will show a page number for the bookmark.
Let us add a hyperlink for this text box:
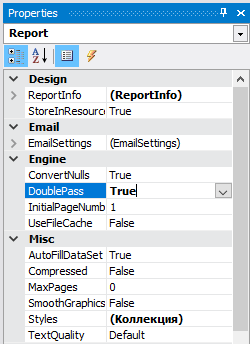
To display the number of pages with bookmarks, you ought to ,firstly, build a report. Speaking about our example, we have page numbers located on the first page of the report and the engine of the report "does not know" page numbers of the bookmarks. It is necessary to enable Dublepass property for the report. It will allow to pass the report twice. The first time - to get the page numbers of bookmarks, the second - to display these numbers on the first page of the report. To find this property, select a report object (Report) in the drop-down list in the Property inspector:
Now our report is ready. Create an ASP.Net MVC project. Please, add FastReports library Reference: FastReport.dll, FastReport.Web.dll.
I will demonstrate the object of the report on the first page of the site, therefore we use the controller "HomeController":
1 2 3 4 5 6 7 8 9 10 11 12 13 14 15 16 |
using FastReport.Web; using System.Web.UI.WebControls; public ActionResult Index() { WebReport webReport = new WebReport(); //Create instance of web report object string report_path = "J:\\Program Files (x86)\\FastReports\\FastReport.Net\\Demos\\Reports\\"; //Set reports path System.Data.DataSet dataSet = new System.Data.DataSet(); //Create data set dataSet.ReadXml(report_path + "nwind.xml"); //Load xml db to data set webReport.Report.RegisterData(dataSet, "NorthWind"); //Register data set in report webReport.Height = Unit.Percentage(100); //Set report height webReport.Width = Unit.Percentage(100); //Set report width webReport.Report.Load(report_path + "InteractiveComplexReport.frx"); //Load report ViewBag.WebReport = webReport; //Pass report to view return View(); } |
Now, edit the view "Home-> Index.cshtml". Keep only the title and the displaying of the report:
1 2 3 4 |
@{ ViewBag.Title = "Home Page"; } @ViewBag.WebReport.GetHtml() |
Add scripts and styles to file Shared->_ Layout.cshtml:
1 2 3 4 |
<head> @WebReportGlobals.Scripts() @WebReportGlobals.Styles() </head> |
Add namespaces to the file "Views->Web.config":
1 2 3 4 |
<namespaces> <add namespace="FastReport" /> <add namespace="FastReport.Web" /> </namespaces> |
Add a handler to the file "Web.config" located in the root of the project:
1 2 3 4 5 6 |
<system.webServer> <handlers> … <add name="FastReportHandler" path="FastReport.Export.axd" verb="*" type="FastReport.Web.Handlers.WebExport"/> </handlers> </system.webServer> |
That is all with the report.
Now run the application. Here is the first page of the report:
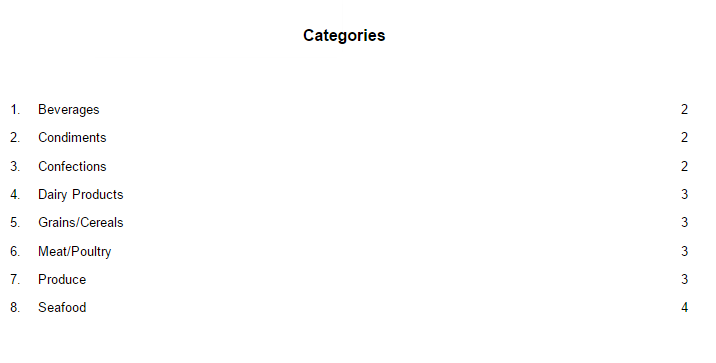
Select any category and move to it:
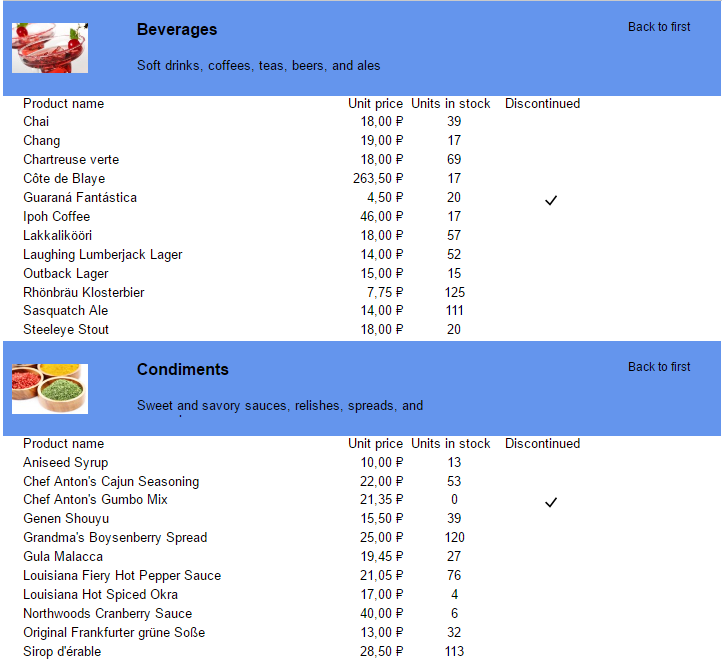
To return to the contents click "Back to first".
Do export of the report in Adobe Acrobat format with the icon ![]() on the web report toolbar.
on the web report toolbar.
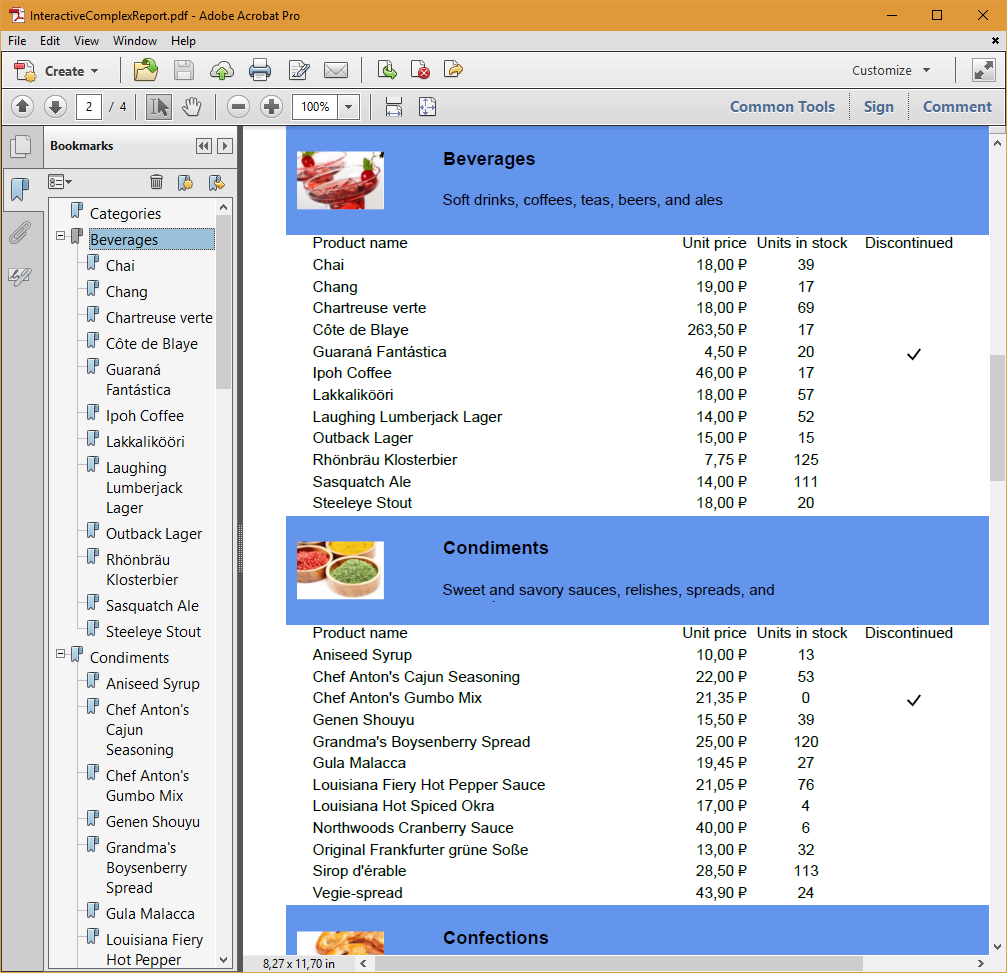
Here we have used the Outline property. There is a detailed report outline on the left of the page.
The example given here concludes that one can make a web report more attractive and easy to use. As it was said at the beginning, this type of interactive reports is perfect to display a product catalog.