How to use an online designer in a web application Mono
Those who came across with an online designer in FastReport .Net certainly appreciated all its advantages and, working with FastReport Mono, would like to use it in their web applications. In fact, there is nothing complicated. Today we will look at the way to create a web application in MonoDevelop and to use the online designer in it.
In addition to the online designer such buttons as download the report to the designer and save the report to the local computer will be located on the page
Let's create an ASP .Net MVC project:

We need to add libraries to the project in References:
FastReport.Mono, FastReport.Web, System.Net.Http.
Download the zip archive with an online designer that you have assembled in an online designer on fast-report.com. Unpack the archive and add the WebReportDesigner folder to the project root.
We also need a folder in which we will save reports, store a file with data. Add the App_Data folder to the project root. We will use demo reports from the FastReport.Mono delivery, so we will need the nwind.xml database. Add it to the App_Data folder.
Now you can start programming. In the Controller folder is the HomeController.cs file. Fix it. In the using section we need libraries:
1 2 3 4 5 6 7 8 9 10 11 12 13 14 15 16 17 |
using System; using System.Collections.Generic; using System.Linq; using System.Web; using System.Web.Mvc; using System.Web.UI; using System.Text; using System.IO; using FastReport; using FastReport.Web; using FastReport.Utils; using System.Web.UI.WebControls; using FastReport.Export.Html; using FastReport.Data; using System.Net.Http.Headers; using FastReport.Export.Image; using System.Net.Http; |
Fix the main, and so far the only web method Index:
1 2 3 4 5 6 7 8 9 10 11 12 13 14 15 16 17 18 19 |
private WebReport webReport = new WebReport(); // Web report object public ActionResult Index() { webReport.Width = Unit.Percentage(100); webReport.Height = Unit.Percentage(100); System.Data.DataSet dataSet = new System.Data.DataSet(); dataSet.ReadXml("App_Data/nwind.xml"); // Read database webReport.Report.RegisterData(dataSet, "NorthWind"); // Register data in the report if (System.IO.File.Exists("App_Data/report.frx")) { webReport.Report.Load("App_Data/report.frx"); } webReport.DesignReport = true; webReport.DesignerPath = "WebReportDesigner/index.html"; webReport.DesignerSaveCallBack = "Home/SaveDesignedReport"; webReport.ID = "DesignReport"; ViewBag.WebReport = webReport; // Pass the report to View return View(); } |
Let’s consider it in more details. Previously, we created a web report object that is accessible inside the class. In the Index () method, at the beginning we set the size of the WebReport object - height and width at 100%. After that we create a data set. And we load into it the xml database. We register the data source in the report. We check if the report template file exists and, if it is successful, load it into the report object.
This is followed by the settings of the web report object. Turn on the report editing mode, which allows you to display the online designer. Then, specify the path to the designer page. In the next step, we set up a view to display the callback when the report is saved. The last setting is the identifier of the report object. We will need this for a View in the future.
Using ViewBag, we pass the report object to the view.
As we agreed at the beginning, in addition to the report designer, the page will contain buttons for downloading the report to the designer and saving the edited report to the local computer.
Write web methods for these buttons. First to upload the report to the server:
1 2 3 4 5 6 7 8 9 10 |
[HttpPost] // The attribute indicates that the method processes the Post request. public ActionResult Upload(HttpPostedFileBase upload) { if (upload != null) { // Save the file on the server upload.SaveAs("App_Data/report.frx"); } return RedirectToAction("Index"); // Call web index method } |
Now the report download method to the local computer:
1 2 3 4 |
public FileResult GetFile() { return File("App_Data/tmp.frx", "application/octet-stream", "tmp.frx"); } |
Great method! Just one line. If only they were all like that ...
The path to the tmp.frx report file is specified in the file parameters. You noticed that in the previous method we saved the report as report.frx. But report.frx is the file of the loaded report template, and our goal is to edit the report, and save it under a different name. Therefore, we need another method - the method of saving the edited report. We will create our own event handler for pressing the report save button in the online designer:

1 2 3 4 5 6 7 8 9 10 11 12 13 14 15 16 17 18 19 |
[HttpPost] // call-back for save the designed report public ActionResult SaveDesignedReport(string reportID, string reportUUID) { ViewBag.Message = String.Format("Confirmed {0} {1}", reportID, reportUUID); if (reportID == "DesignReport") { Stream reportForSave = Request.InputStream; string pathToSave = "App_Data/tmp.frx"; using (FileStream file = new FileStream(pathToSave, FileMode.Create)) { reportForSave.CopyTo(file); } } return View(); } |
In the first line, we show a message confirming the saving of the report. Then, we check the report identifier, if it is equal to "DesignReport", then we send the result to the stream. And create a new report template file based on this stream.
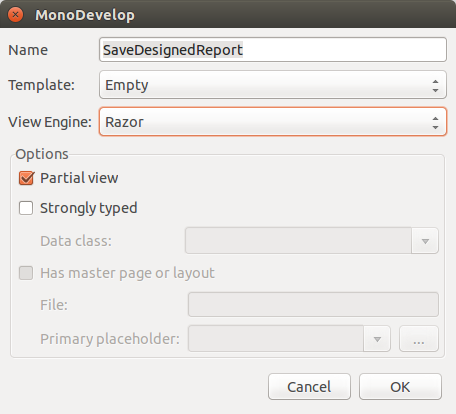
For this method, we need to create a view. Right-click on the method signature and create a new view (create view):
In the "view" code, simply display the message:
<h2>@ViewBag.Message</h2>
Thus, the second file will appear in the Home folder – SaveDesignedReport.cshtml.
Do you remember, in the Index () method, we specified the web report property? webReport.DesignerSaveCallBack = "Home/SaveDesignedReport"? It's time to set the value of this property if you didn’t know what your view would be called to display the callback to save the report.
Now let's move on to an equally interesting part - coding the Index.cshtml view:
1 2 3 4 5 6 7 8 9 10 11 12 13 14 |
@{ ViewBag.Title = "Home Page"; } <h3>Select file</h3> @using (Html.BeginForm("Upload", "Home", FormMethod.Post, new { enctype = "multipart/form-data" })) { <input type="file" name="upload" /> <input type="submit" value="Upload" /> } @using (Html.BeginForm("GetFile", "Home", FormMethod.Get)) { <input id="dwn" type="submit" value="Download designed report" /> } @ViewBag.WebReport.GetHtml() |
Here, we display the title. And use the BeginForm helper to create a form with a file upload field and a button. As parameters, this helper accepts the name of the web method from the controller, the name of the controller, the type of request, the way the data is encoded.
As far as you remember we created two methods in HomeController: to download the report to the designer and to download the report to the local computer. The names of the web methods in the forms created by the helper must match the names from the controller.
As you can see, we also created a form with a button to download the report from the server to the local computer. In the last line of code, we convert the report into HTML format and display it. To do this, use the built-in method GetHtml (), which causes the export of the constructed report to this format (in our case, the designer).
In the master file of the _Layout.cshtml page, you need to connect FastReport scripts:
There are two web configs in the project. In the ASP.Net project, the web.config only applies to the directory in which it is located, and to all subdirectories. Therefore, the Web.config located in the Views directory is designed specifically for views. Open it and add a couple of lines to the Namspaces section:
1 2 3 4 5 6 |
<system.webServer> <namespaces> … <add namespace="FastReport" /> <add namespace="FastReport.Web" /> </namespaces> |
The second Web.config is at the root of the project, which means it configures the entire application. We’ll add a handler to it to enable exporting the web report object to the Html format:
1 2 3 4 5 6 |
<system.webServer> <handlers> … <add name="FastReportHandler" path="FastReport.Export.axd" verb="*" type="FastReport.Web.Handlers.WebExport"/> </handlers> </system.webServer> |
If there are no <system.webServer> and <namespaces> sections in the web.config, then add them.
At this step we can be considered our little web application ready. Let's run it on the xsp debug web server. Just clock Ctrl + F5.
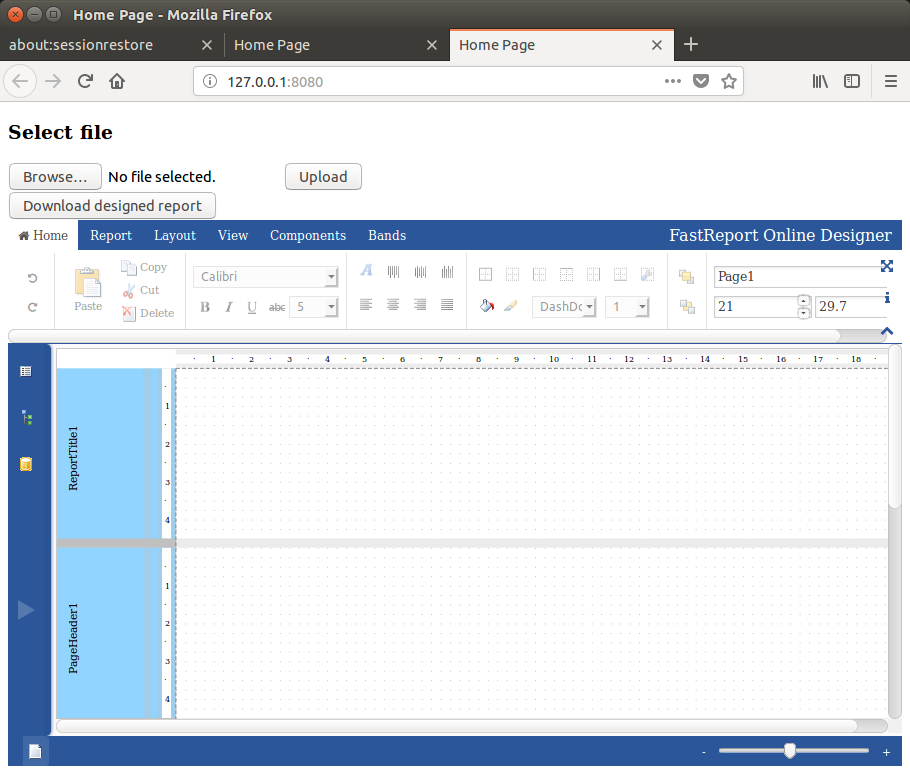
The Browse... button and the label with the file name appeared thanks to <input type = "file" name = "upload" />. Click this button and select a report template file.
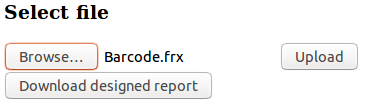
The label now displays the file name. Click the Upload button:
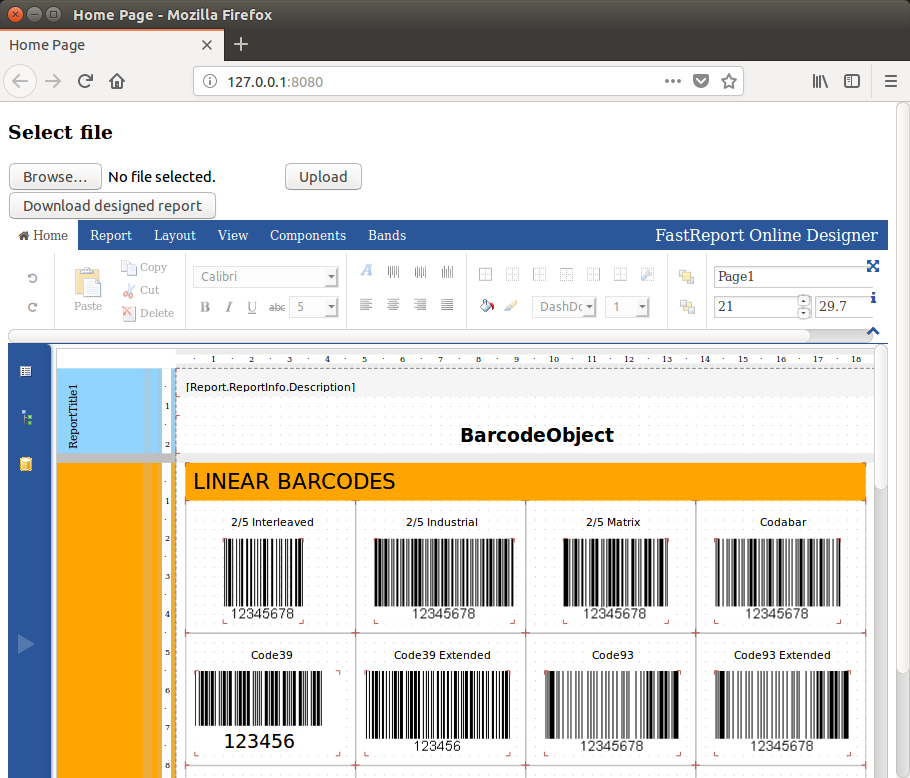
The report is uploaded to the designer. Now we can make the necessary changes to the report template. Then go to the Report tab and click on the save icon:

After that, the report is ready for download, so click the Download designed report button. A standard browser dialog box appears in which we are offered to download a report or reject an action. Download the report and find it in the downloads folder.
That's all. As you can see, ASP .Net web projects on Linux is quite real. Not much more difficult than under Windows.