How to send a report to Email from a database in .NET Core application
We have already discussed how to send a report to a group of emails from the database. In this article we will do the same, but for a web application on the .NET Core MVC platform. Let me remind you that our task is to get a list of email addresses and user names from a certain database and, send emails with an attached report to these mailboxes. Let's use the MS SQL Server database.
![]()
Create an ASP application .NET Core MVC application. First of all, add the necessary libraries to the project using NuGet Packages Manager. In the general nuget repository we find and install packages:
- Microsoft.EntityFrameworkCore;
- Microsoft.EntityFrameworkCore.Relational;
- Microsoft.jQuery.Unobtrusive.Ajax;
- jQuery.
From the local repository - the Nuget folder in the FastReport.Net installation directory, install the packages:
- FastReport.Core;
- FastReport.Web.
And now we will create the context of work with the database and the class-essence of the table. To do so, open the package console Nuget. Open the Tools -> Nuget Package Manager -> Package Manager Console menu. In the console, type the following command:
scaffold-dbcontext "Server=localhost;Database=testdb;Trusted_Connection=True;" Microsoft.EntityFrameworkCore.SqlServer -OutputDir Models
Of course, here you have to specify your connection string to the database server and a folder for the data model (Models by default).
PM> scaffold-dbcontext "Server=localhost;Database=testdb;Trusted_Connection=True;" Microsoft.EntityFrameworkCore.SqlServer -OutputDir Models
After that, in theory, two files should be added to the Models folder: the context and the table entity. In my case, this is testdbContext.cs and Emails.cs.
However, an error may occur during file generation:
error MSB4064: The "SharedCompilationId" parameter is not supported by the "Csc" task. There is a settable public instance property.
If this happens, add one more package in the NuGet package manager:
Microsoft.Net.Compillers
Let's connect FastReport to our project right away. In the Startup.cs file, add the line:
1 2 3 4 5 6 |
public void Configure(IApplicationBuilder app, IHostingEnvironment env) { … app.UseFastReport(); … } |
Now back to the data model. To get records from the database, we need to create the GetEmails method. Create a class facade for working with data:
1 2 3 4 5 6 7 8 9 10 11 12 13 14 15 |
namespace WebMailing.Models { public static class Facade { public static List<Emails> GetEmails() { using (Models.testdbContext context = new Models.testdbContext()) { var emails = (from adresses in context.Emails select adresses).ToList(); return emails; } } } } |
Let's go to the ‘HomeController’ controller. In the Index method, load the report to display it on the main page of the site:
1 2 3 4 5 6 7 8 9 10 11 12 13 14 15 16 17 |
using System; using System.Collections.Generic; using System.Diagnostics; using Microsoft.AspNetCore.Mvc; using WebMailing.Models; using FastReport; using FastReport.Export.Pdf; using FastReport.Export.Email; using FastReport.Web; … public IActionResult Index() { WebReport webReport = new WebReport(); webReport.Report.Load(Environment.CurrentDirectory + "/text.frx"); ViewBag.WebReport = webReport; return View(); } |
We will add two methods of sending emails. The first one will send personal letters with the name of the client in the greeting, the second one will send one letter to a group of addresses.
So, the first method is:
1 2 3 4 5 6 7 8 9 10 11 12 13 14 15 16 17 |
[HttpPost] public ActionResult SendMail() { Report report1 = new Report(); //Create new report object report1.Load(Environment.CurrentDirectory + "/text.frx"); //Load report report1.Prepare(); //Prepare report PDFExport pdf = new PDFExport(); //Cteate PDF export EmailExport email = new EmailExport(); //Create Email export List<Emails> emails = Models.Facade.GetEmails(); foreach (Emails item in emails) { SendMessage(report1, pdf, email, item.Email, item.Name); } return View(); } |
Using it, we created a report, export to PDF, export to Email. Then, in the loop, we get the records from the table and call the method of sending the letter. As parameters, we pass in the report object, export PDF, export to Email, Email address and client name. And here is the method of sending the letter:
1 2 3 4 5 6 7 8 9 10 11 12 13 14 15 16 17 18 |
public void SendMessage(Report report, PDFExport pdf, EmailExport email, string recipient, string custName) { string message = "This is test message."; email.Account.Address = "gromozekaster@yandex.ru"; email.Account.Name = "Test User"; email.Account.Host = "smtp.yandex.ru"; email.Account.Port = 25; email.Account.UserName = "Gromozekaster"; email.Account.Password = "*****"; //Your password email.Account.MessageTemplate = "Test"; email.Account.EnableSSL = true; //email addressee settings email.Address = recipient; email.Subject = "TestMessage"; email.MessageBody = custName is null ? message : string.Format("Dear, {0}! {1}", custName, message); email.Export = pdf; //Set export type email.SendEmail(report); //Send email } |
In it, we set up an email client to send a letter. And immediately add the second method of sending one letter to a group of addresses:
1 2 3 4 5 6 7 8 9 10 11 12 13 14 15 16 17 18 19 20 21 |
[HttpPost] public ActionResult SendAll() { Report report1 = new Report(); //Create new report object report1.Load(Environment.CurrentDirectory + "/text.frx"); //Load report report1.Prepare(); //Prepare report PDFExport pdf = new PDFExport(); //Cteate PDF export EmailExport email = new EmailExport(); //Create Email export List<Emails> emails = Models.Facade.GetEmails(); string addresses = ""; foreach (Emails item in emails) { if (addresses == "") addresses = item.Email; else addresses = addresses + ", " + item.Email; } SendMessage(report1, pdf, email, addresses, null); return View(); } |
As you can see, it is very similar to the previous method, with the only difference that in the cycle we receive all email addresses, and send the letter once. As an email parameter, we pass a string variable with all email addresses, but we don’t pass the client name.
For both the SendMail () and SendAll () methods, we need to create views of the same name — view.
Their contents are extremely simple:
1 2 3 4 |
@{ ViewBag.Message = "Report was sent"; } @ViewBag.Message |
We just inform about sending.
Let's move on to the Index.cshtml view. In it, we need to add two buttons to send letters using different methods, as well as display the report:
1 2 3 4 5 6 7 8 9 10 11 12 13 14 15 16 17 18 19 20 21 22 23 24 25 26 27 28 29 30 31 32 33 34 |
@{ ViewData["Title"] = "Home Page"; } <script src="https://cdnjs.cloudflare.com/ajax/libs/jquery/1.12.1/jquery.min.js"></script> <form action="SendMail" method="POST"> <input type="button" id="SendPersonal" value="Send Personal Email"> <input type="button" id="SendAll" value="Send Email to All"> <div class="answer"/> </form> <script type="text/javascript"> $('#SendPersonal').on("click", function () { $.ajax({ type: 'POST', // dispatch method url: '@Url.Action("SendMail", "Home")', // path to handler dataType: 'text', success: function (data) { $(".answer").html(data); // upon successful receipt of the response from the server, we enter the data in the element with the class answer } }); return false; }) $('#SendAll').on("click", function () { $.ajax({ type: 'POST', // dispatch method url: '@Url.Action("SendAll", "Home")', // path to handler dataType: 'text', success: function (data) { $(".answer").html(data); // upon successful receipt of the response from the server, we enter the data in the element with the class answer } }); return false; }) </script> @await ViewBag.WebReport.Render() |
To use ajax jquery we add a link to the jquery.min.js script. Next, add a form with two buttons and two scripts for each of them. The scripts are extremely simple - call the method from the controller and return the resulting view.
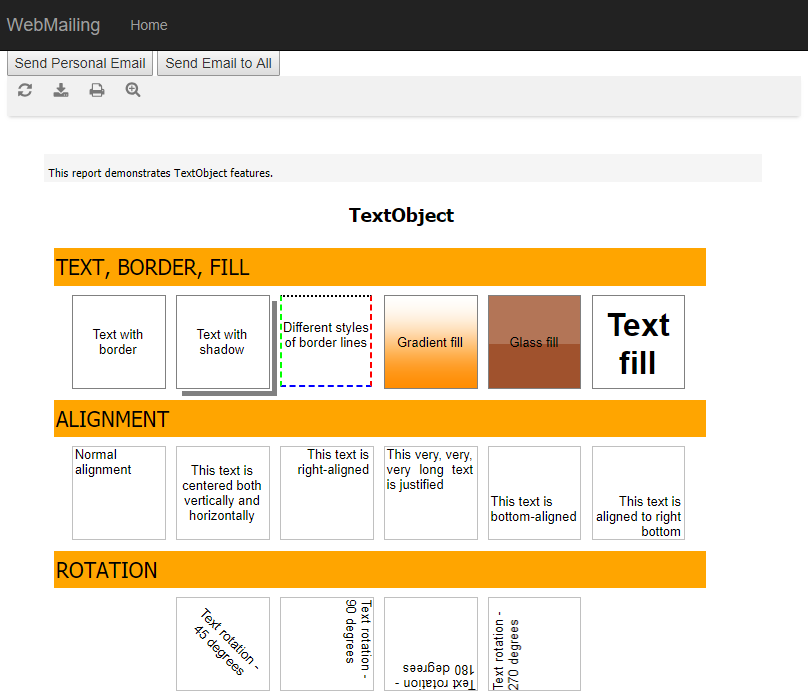
At the end - we deduce the report from the Index method. Just for beauty. Let's run the application and see what our web page looks like:

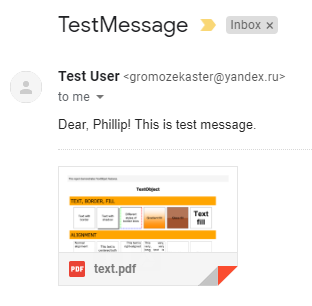
We send letters by different methods:

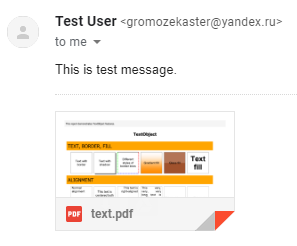
And:

In the first case, in the text of the letter we refer to the client by name, in the second there is none.
That's all.