One of the most popular frameworks for creating single-page applications is Angular. It is based on MVC template, which simplifies the development and testing of such application. Many users of the report generator FastReport need to display their reports in Angular web applications, which we discussed in the article using FR Core Web Report in Single Page Application Angular 7. Now, on the webpage we can display not only the report but also the data cube from FastCube .NET. Let us see how to do it.
Initially, you should have installed: platform Node.js and NET Core SDK 2.0, or better newer.
You may create an application using a template from sdk. To do that, type a command in a command line:
dotnet new angular -o FCubeAngular
This command creates a demo application ready for start. All we have to do is to add our functional. Now in the command line we go to the catalog with the created application with the help of a command:
cd FCubeAngular
and install javascript packages with a command:
npm install
Before starting to work with our web application, it is necessary to prepare Nuget packages with FastCube libraries. Open the FastCube.Core.sln solution and construct the object. You will get two packages - FastCube.Web.2020.2.1.nupkg and FastCube.Core.2020.2.1.nupkg. They should be placed into a local directory, which you will later use as a local source of Nuget packages.
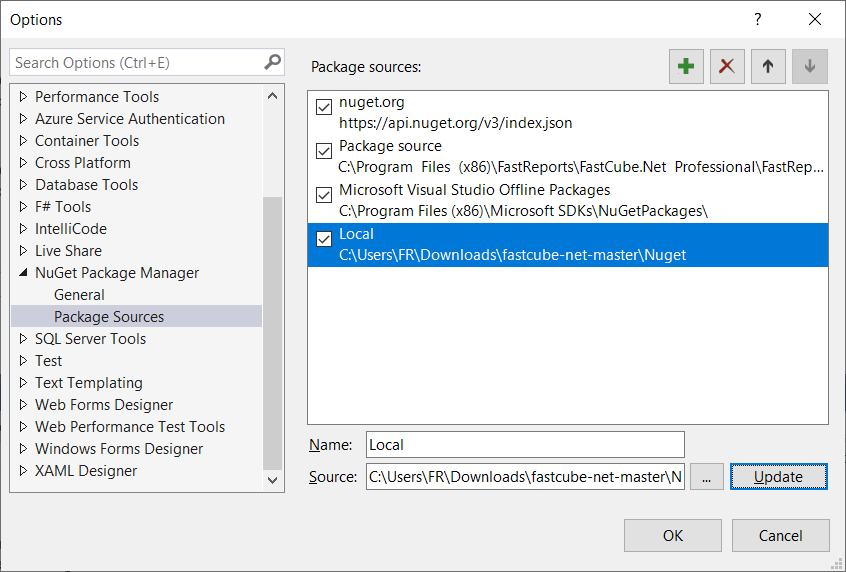
Now you can start the project which you had created before. We can immediately start installing FastCube packages. Open Nuget package manager. In the upper right corner of the window you can see a gear icon, it opens settings of the package sources. Click it and add a new source of packages – the directory with our FastCube packages:
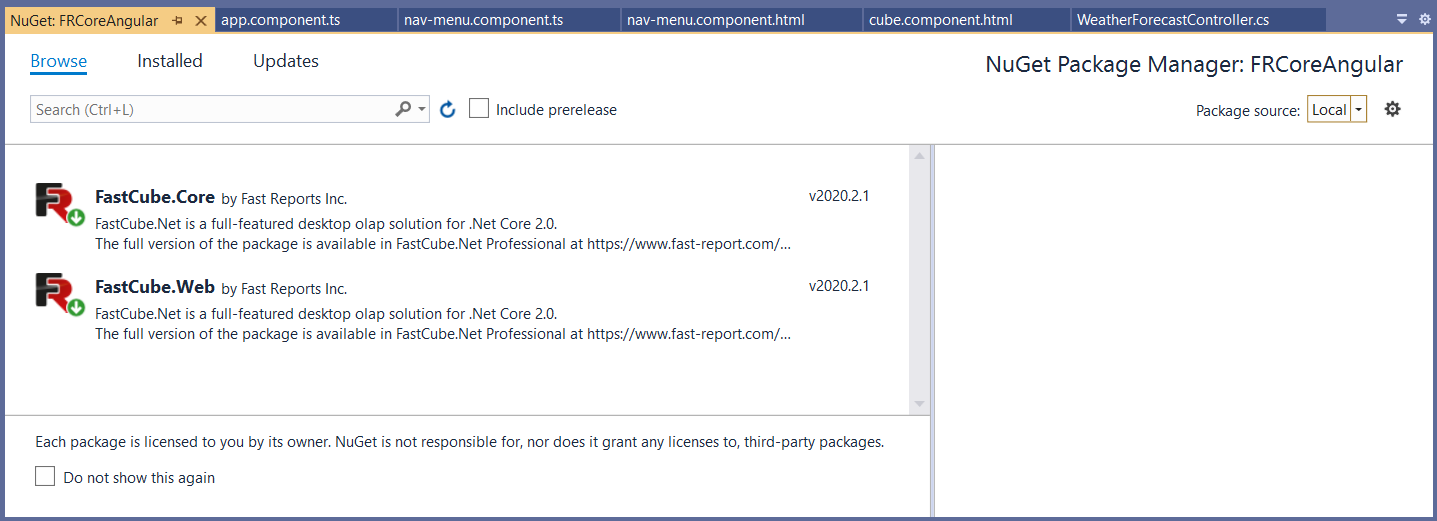
Select the added package source in the drop-down list and install the packages:
Plug in FastCube in Startup.cs file in the Configure() method by adding a code:
app.UseFastCube();
Our application already contains the controller WeatherForecastController. Let us add our web method to it:
 [HttpGet("[action]")]
 public IActionResult ShowCube()
 {
 Cube cube = new Cube();
 Slice slice = new Slice()
 {
 Cube = cube
 };
 FilterManager filterManager = new FilterManager()
 {
 Cube = cube
 };
 WebGrid grid;
 grid = new WebSliceGrid()
 {
 Slice = slice
 };

 ViewBag.WebGrid = grid;

 cube.SourceType = SourceType.File;
 cube.Load(Path.Combine("C:\\Users\\FR\\Downloads\\fastcube-net-master\\Demos\\Data\\", "Cubes", "calculated_measures.mdc"));
 return View();
 }
If you face problems with the returned display, check the class from which the controller is inherited. It must be Controller, not BaseController.
Now let us consider the web method we had added. The Cube and Slice objects are connected, because, actually, a slice is a part of a cube. To output an interactive cross table, the WebGrid object is used. It can output both a WebCubeGrid slice and a WebSliceGrid cube. We download the cube we had created earlier in the desktop version of FastCube .NET.
To display it, we will need a view. This can be done with a right-button click on the ShowCube method signature. The view will contain a single code line:
@await ViewBag.WebGrid.Render()
Let us go to a SPA application placed in the ClientApp directory. We need to add our component into the app directory. It will display iframe with the view which we had created above. Add a cube subdirectory in the app directory. Add two files into it: cube.component.html and cube.component.ts. The first one is a display, the second is a controller.
The file cube.component.html:
Mind the function safeUrl, which transforms url to a safe mode. We will add it later.
The button activates the Click function, which installs the show flag to display the frame and sets url to ShowCube method in the controller at backend.
This is implementation of the Click function in cube.component.ts file:
import { Component } from '@angular/core';

@Component({
 selector: 'app-cube-component',
 templateUrl: './cube.component.html'
})
export class CubeComponent {
 public show: boolean = false;
 public url: string;

 Clicked() {
 this.show = true;
 this.url = "/WeatherForecast/ShowCube";
 }
}
Now we add the function of transforming the link into the normal mode – add file safeUrl.pipe.ts into the same directory:
import { Pipe, PipeTransform } from '@angular/core';
import { DomSanitizer } from '@angular/platform-browser';

@Pipe({ name: 'safeUrl' })
export class SafeUrlPipe implements PipeTransform {
 constructor(private sanitizer: DomSanitizer) { }
 transform(url) {
 return this.sanitizer.bypassSecurityTrustResourceUrl(url);
 }
}
The added component and function must be registered in the app.module.ts file:
import { BrowserModule } from '@angular/platform-browser';
import { NgModule } from '@angular/core';
import { FormsModule } from '@angular/forms';
import { HttpClientModule } from '@angular/common/http';
import { RouterModule } from '@angular/router';

import { AppComponent } from './app.component';
import { NavMenuComponent } from './nav-menu/nav-menu.component';
import { HomeComponent } from './home/home.component';
import { CounterComponent } from './counter/counter.component';
import { FetchDataComponent } from './fetch-data/fetch-data.component';
import { CubeComponent } from './cube/cube.component';
import { SafeUrlPipe } from './cube/safeUrl.pipe';

@NgModule({
 declarations: [
 AppComponent,
 NavMenuComponent,
 HomeComponent,
 CounterComponent,
 FetchDataComponent,
 CubeComponent,
 SafeUrlPipe
 ],
 imports: [
 BrowserModule.withServerTransition({ appId: 'ng-cli-universal' }),
 HttpClientModule,
 FormsModule,
 RouterModule.forRoot([
 { path: '', component: HomeComponent, pathMatch: 'full' },
 { path: 'counter', component: CounterComponent },
 { path: 'fetch-data', component: FetchDataComponent },
 { path: 'cube', component: CubeComponent }
 ])
 ],
 providers: [],
 bootstrap: [AppComponent]
})
export class AppModule { }
Also, we add a new header into the menu in file nav-menu.component.html:
<header>
 <nav
 class="navbar navbar-expand-sm navbar-toggleable-sm navbar-light bg-white border-bottom box-shadow mb-3"
 >
 <div class="container">
 <a class="navbar-brand" [routerLink]="['/']">FRCoreAngular</a>
 <button
 class="navbar-toggler"
 type="button"
 data-toggle="collapse"
 data-target=".navbar-collapse"
 aria-label="Toggle navigation"
 [attr.aria-expanded]="isExpanded"
 (click)="toggle()"
 >
 <span class="navbar-toggler-icon"></span>
 </button>
 <div
 class="navbar-collapse collapse d-sm-inline-flex justify-content-end"
 [ngClass]="{ show: isExpanded }"
 >
 <ul class="navbar-nav flex-grow">
 <li class="nav-item"
 [routerLinkActive]="['link-active']"
 [routerLinkActiveOptions]="{ exact: true }">
 <a class="nav-link text-dark" [routerLink]="['/']">Home</a>
 </li>
 <li class="nav-item" [routerLinkActive]="['link-active']">
 <a class="nav-link text-dark" [routerLink]="['/counter']">Counter</a>
 </li>
 <li class="nav-item" [routerLinkActive]="['link-active']">
 <a class="nav-link text-dark" [routerLink]="['/fetch-data']">Fetch data</a>
 </li>
 <li class="nav-item" [routerLinkActive]="['link-active']">
 <a class="nav-link text-dark" [routerLink]="['/cube']">Cube</a>
 </li>
 </ul>
 </div>
 </div>
 </nav>
</header>
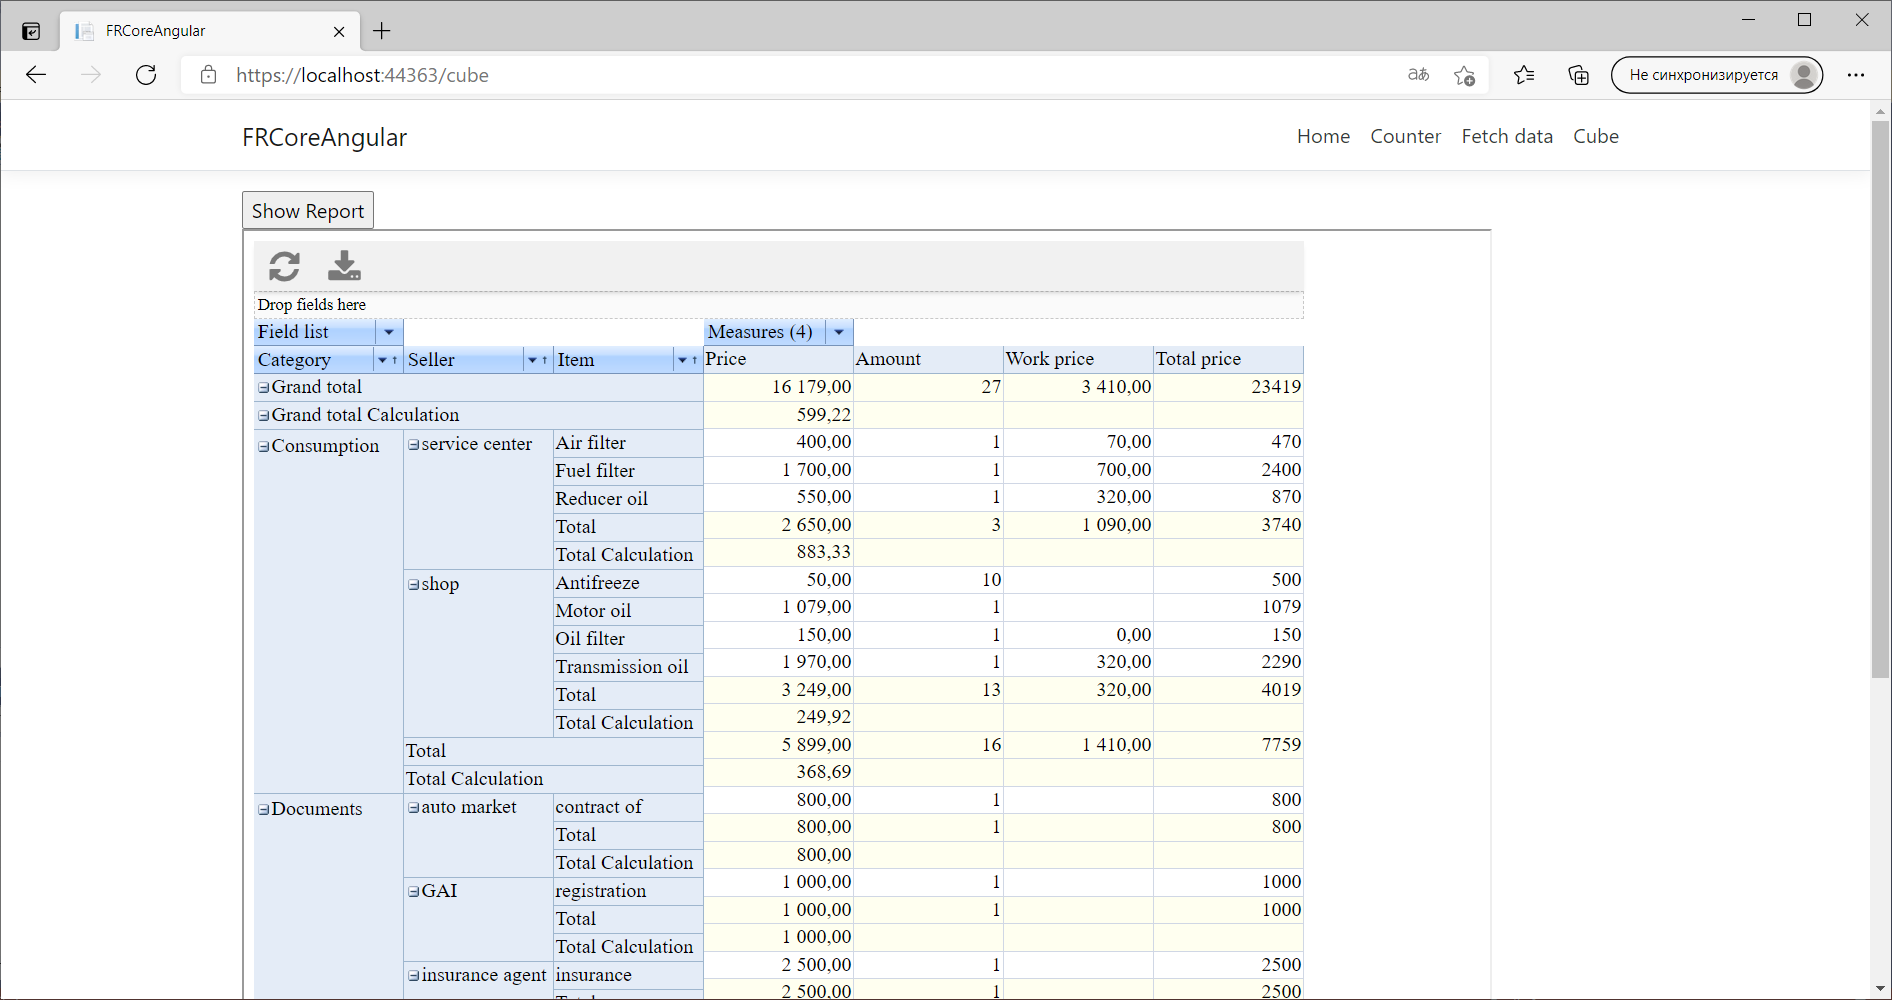
The application is ready. We run it:
This simple example shows how one can display a data cube based on FastCube libraries in a single-page application Angular. Now the web application provides you with a convenient tool for data analysis. You can add or remove measures, facts, or filter your data.


