Connecting to MySQL DB from the report
It is known that FastReport .NET can work with almost any database. And quite often the users the question arises, how to connect MySQL database to your report. In this article we will look at the process inside and out, and in two versions:
1. In the first method, you can use special plugin to connect to the MySQL database. This plug-in is a dll library. To obtain this library, you need to build the project from FastReport .NET delivery. It is located in the folder: FastReport.Net\Extras\Connections\FastReport.MySQL. After assembly in the bin folder you will find FastReport.MySQL.dll library.
Open the report designer. Open the File-> Options menu:
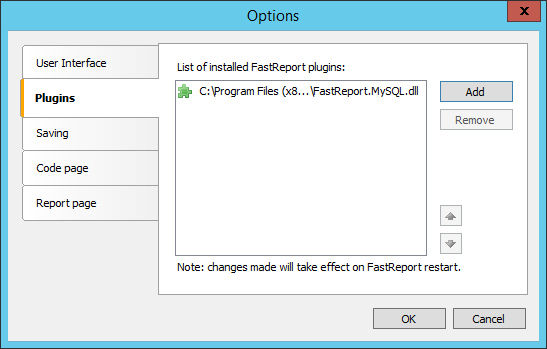
On the Plugins tab add our library by using the Add button. Now restart the designer.
Add a new data source in the report. In the Data Wizard create a new connection:
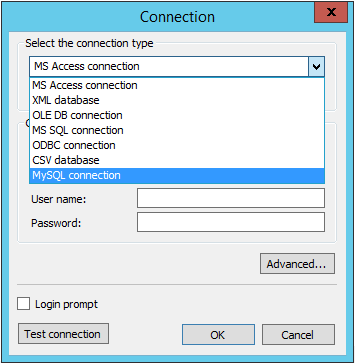
In the list of connection types there is a new one - MySQL connection. Choose it:
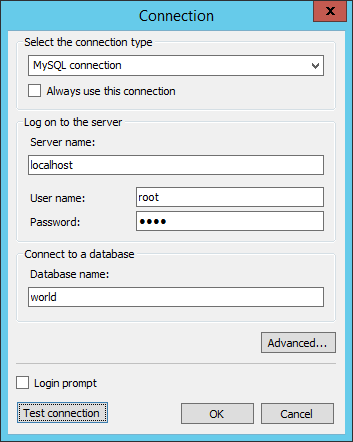
Fill the fields and click Ok. In the Data Wizard, select the table from the database “world”. For example, city:
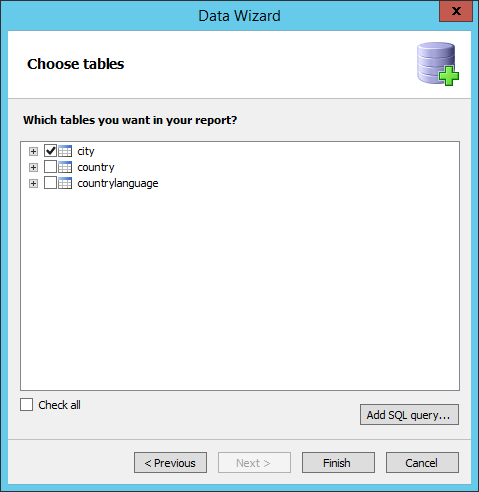
Click Finish to complete the wizard. That's all. The obtained data can be used in the report.
2. Consider the second method - use the native connector ODBC Driver for MySQL.
You can download it from the developer - http://dev.mysql.com/downloads/connector/odbc/.
The installation does not cause problems - everything is simple and clear.
Next, run the report designer and create a new report. On the Report tab, add a new data source using the icon  .
.
In the Data Wizard, create a new connection (New connection ...):
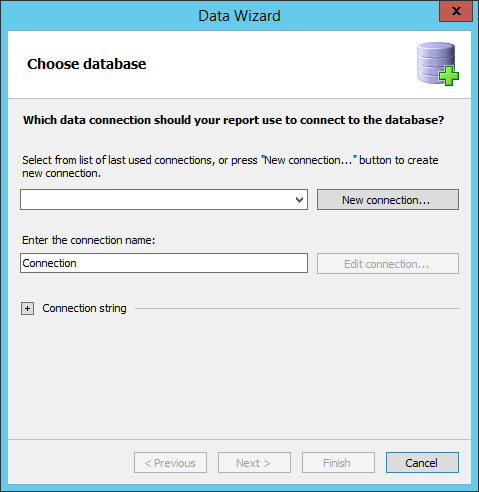
In the connection editor, select the type of connection - ODBC connection:
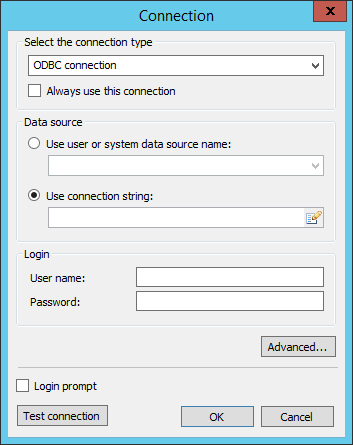
Switch the radio button to "Use connection string:". And press the button  to create a connection string. In this case you will be prompted to select a data source:
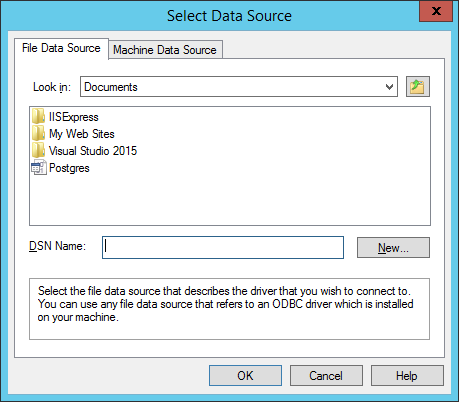
Click the button "New ...". The wizard of creation data source will be launched:
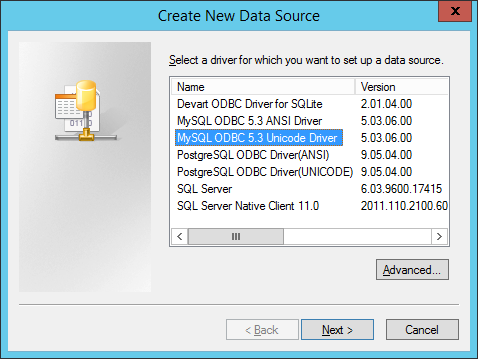
Choose one of the two available: MySQL ODBC. Ansi or Unicode encodings depends on your database. Click "Next." And set the connection options:
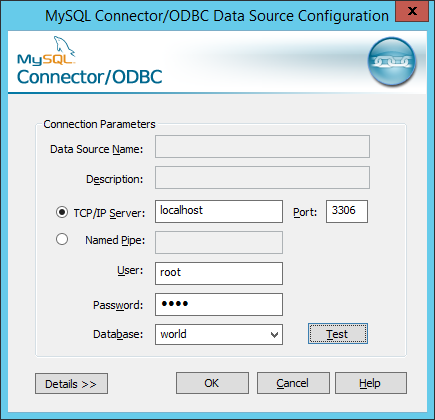
After closing this window, select the created connection in the "Select Data Source" box.
Once again we see the connection settings. Enter your password and click Ok.
Thus we get the customized connection in our Data Wizard:
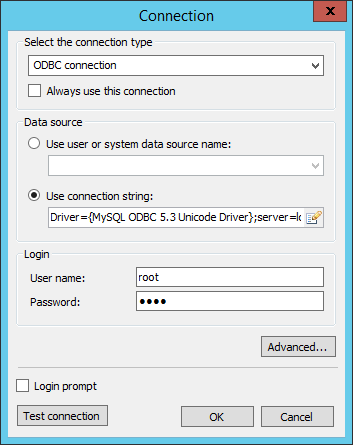
Click OK. In the wizard, click Next and proceed to the tables selection:
We have considered two ways to create a connection to the database MySQL. The first method is a little more complicated in the beginning, when you want to build a library, but more convenient for subsequent reuse plugin. The second method seemed to me less convenient for subsequent use.