Let's look at some other settings available in the cross-tab editor.
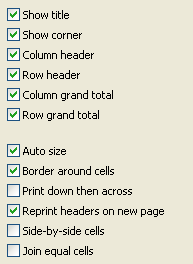
The first six options allow you to show or hide various table elements.
The “Auto size” option is already well known. It allows us to set the table width and height manually.
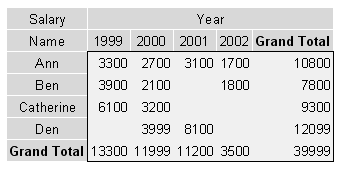
The “Border around cells” option allows the drawing of a frame around the cell elements. Here is an example table with a border (note that the cells themselves don't have borders):
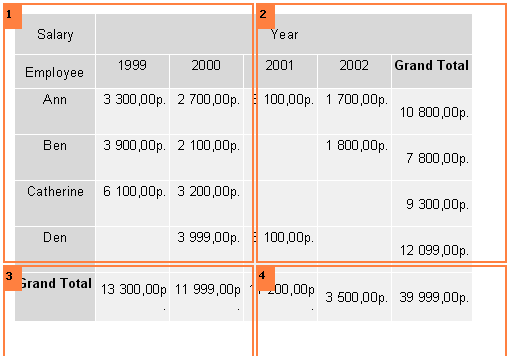
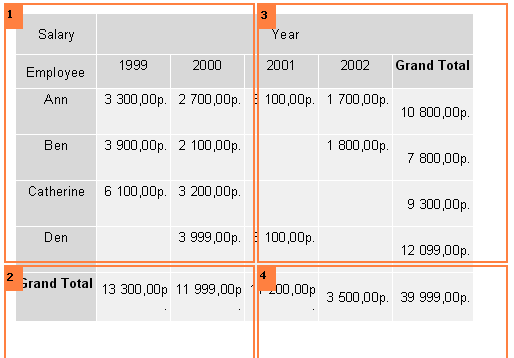
The “Print down then across” option determines how a table is printed across several pages. Here are two examples showing how this option works (note the page order):
1) “Print down then across” is off:
2) “Print down then across" is on:
The “Reprint headers on new page” option determines whether table headers are printed on each new preview page.
The “Side-by-side cells” option is used if you have two or more values in a table cell. It determines if these cell values are printed side-by-side or stacked one above the other (the default).
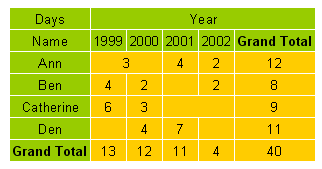
The “Join equal cells” option merges cells horizontally if they contain the same value:
Some other properties are also available in the object inspector:
- AddWidth, AddHeight : adds a specified amount of space to the cell width or height. It is taken into account when the FastReport engine calculates the cell size (the “Auto size” option must be on)
- NextCross : a pointer to another cross-tab object that will be printed to the side of this one
- NextCrossGap : the gap between the two adjacent cross-tab objects