Header setup
Adding an item
There are two ways to add an element to the header:
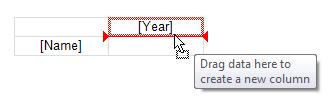
- by dragging the field from the "Data" window. As you drag, it will show in which part of the header a new element will be added:
- using the header context menu. Select the element next to which you want to add a new element and select one of the "Add a new element" commands from the context menu. An empty new element will be added;
- you can also add a "Total" element (before or after the selected element) using the context menu. A new element will be added with the text "Total" (the text depends on the current localization).
Adding a total is equivalent to adding an empty item and editing its text.
When you add a database field from the "Data" window to an empty matrix, its
DataSourceproperty is automatically configured.
Removing an element
You can delete an element by selecting the "Delete" item in the context menu. You can delete only the selected element, or the element tree (the selected element and all its children).
You can also delete an element by pressing the Delete key. In this case, only the selected element is deleted.
An element with a lock icon cannot be deleted in the described way. See section TopN Grouping.
Moving an element
To move an element to a new location, select it with the left mouse button. The element will be marked with a thick black frame:
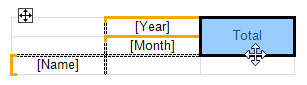
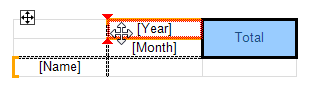
Grab the element by the frame and move it to a new location. As you drag, it will show in which part of the header a new element will be added:
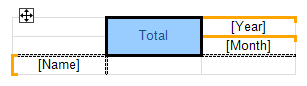
Release the mouse button and the element will be moved to a new location:
If the element has children, they will be moved with the main element, if it is possible.
Editing elements
To call the element editor, double-click on it with the left mouse button, or select the "Edit ..." in the context menu. You can also call the editor by pressing Enter.