Data area setup
Adding an item
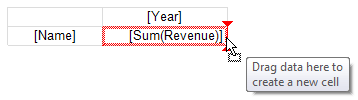
You can add an element by dragging the DB field from the "Data" window. As you drag, it will be shown in which part of the data area the new element will be added:
When you add an element to an empty matrix, its Property
DataSourceis automatically configured.
When adding a new item, its title will also be added next to the existing one:
Removing an element
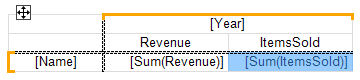
You can clear the text of an element by сhoosing Delete or "Clear" from the item menu. The data element itself cannot be deleted; for this, you should delete the corresponding element in the matrix header. In the example above, you must remove the element "Revenue" from the header in order to delete [Sum(Revenue)].
Editing an item
To edit the text of an element, double click to call the text editor window. You can also call the editor by pressing the Enter key.
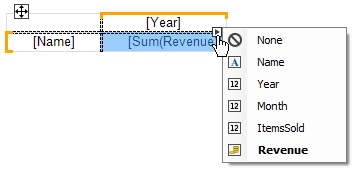
You can quickly select a DB field displayed in an element using the (smarttag) speed button, which is displayed when the mouse cursor is inside the element:
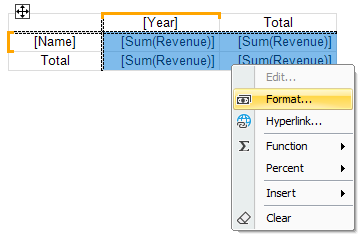
You can also perform the following operations using the context menu of an element:
- call the element editor;
- customize data formatting;
- change type of aggregate function (see section Aggregate functions);
- add interest calculation;
- insert a progress indicator or sparkline into the cell.
Editing multiple elements
For bulk editing of cells, you can select the entire data area or multiple cells. This can be done using the Shift key or the mouse:
- select the starting cell;
- click the left mouse button and hold it while moving the mouse to select a group of cells;
For the selected cells, you can call the context menu or use the quick selection button for the database field: