In this example we will build a report that displays the category list. When clicking on the category name, a detailed report that contains the list of products' in the given category will be shown.
You need to do the following:
| • | first create a detailed report; |
| • | define the report parameter which identifies a category; |
| • | set up data filtration on this parameter; |
| • | create the main report; |
| • | in the main report, configure the hyperlink such that, the detailed report can be run with the parameter set to the chosen category. |
Firstly, we will create a detailed report which prints a list of products. For this, create a new report and choose the "Products" table as a data source. Place the objects in the following way:

Create the parameter which will be used to pass a selected category from the main report to the detailed one. For category identification, we will use the "CategoryID" column which is contained in both "Categories" and "Products" tables. Configure the parameter in the following way:

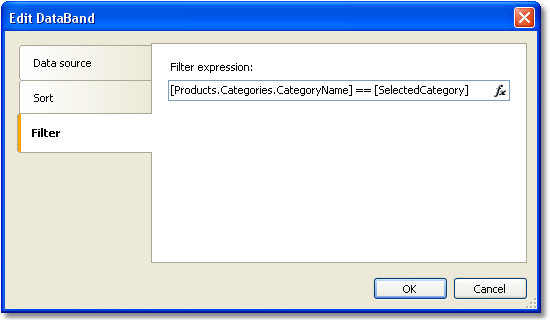
Now we need to set data filtering to filter all products that belong to the specified category. To do this, double click the "Data" band. Switch to the "Filter" tab and indicate the following condition:
Now create the main report. Create a new report and choose the "Categories" table as a data source. Place the objects in the following way:

Right click on the "Text" object and select the "Hyperlink..." menu item. Set up the link in the following way:
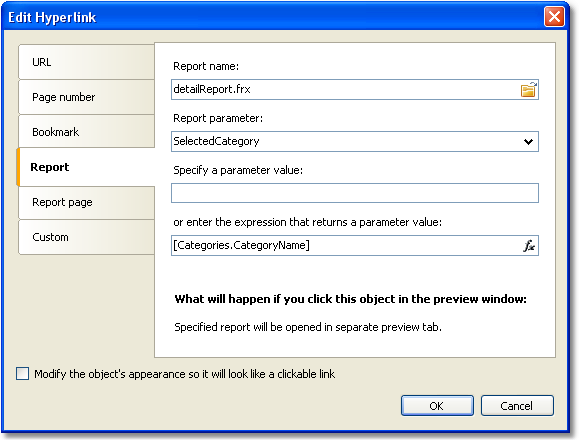
As a report name, choose the name of the detailed report file. Report parameter can be chosen from the drop-down list, by pressing the button on the right side of the list. As a parameter value, indicate the "[Categories.CategoryID]" expression.
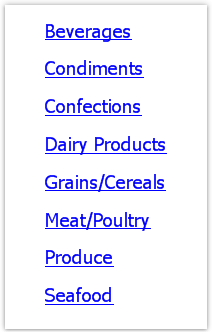
Run the report, and you will see the categories list:
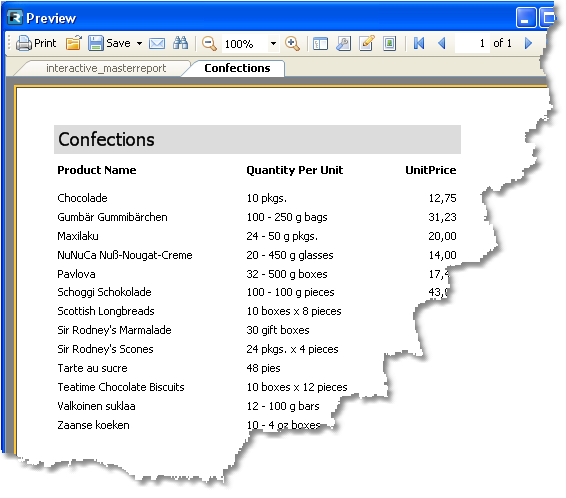
If you click on one of the categories, a detailed report will be built. It will be shown on a separate tab of the preview window:
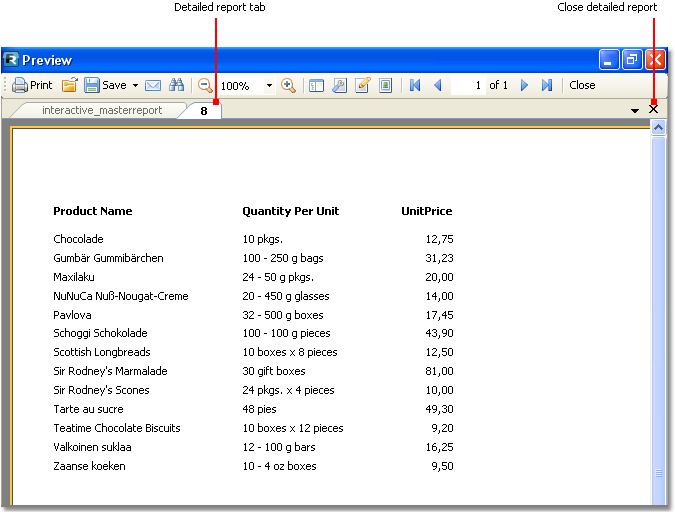
As seen on the picture, the title of the tab is set to the hyperlink's value. In our case, this is the numeric value contained in the "CategoryID" data column. This appears not informative and not beautiful. Let's change our report to use the category name instead of its number. For this, do the following:
In the detail report:
| • | change the parameter's "DataType" property to the "String"; |
| • | add the "Categories" data source into the report. It will be used for referring to the "CategoryName" column when filtering data; |
| • | change the filtering expression of the "Data" band: |
[Products.Categories.CategoryName] == [SelectedCategory]
In the main report:
| • | change the hyperlink settings. Now we will pass the "[Categories.CategoryName]" value into the report parameter. |
If we run the report now, we will see that the title of the tab is set to category name. We can improve the detailed report a little. Add the "Text" object, which will print the name of the chosen category in the report title:
While we are working with this example, we have created two reports and swap between them several times. This is not very comfortable. In order to make the task easier, two reports can be placed into one: the main report will be on the first page, the detail one on the second page. In this case the hyperlink needs to be set in the following way:
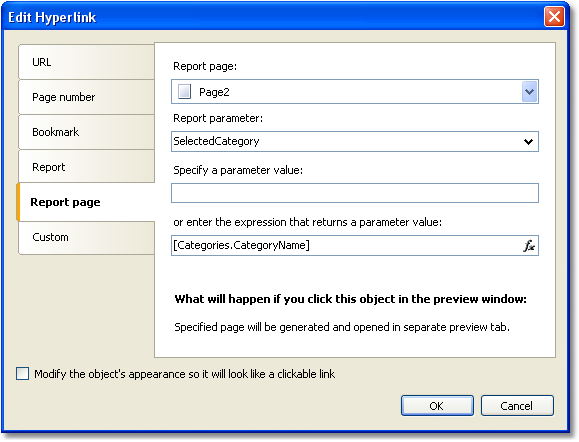
In the given case, we need to choose Page2 as the detail report page.