In order to create a relation, click the "Actions" button in the "Data" window, and select the "New relation..." item. You will see the relation editor:
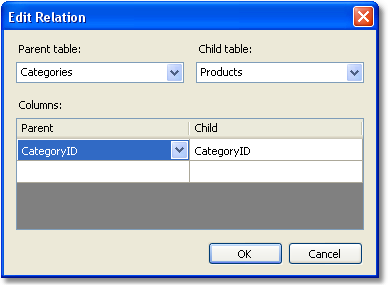
In the first place, you need to choose the parent and the child tables. After this, in the lower part of the window, you need to choose related data columns. The tables can be related with the help of one or several data columns. After the columns have been set, close the relation editor by pressing the Ok button.
The relation that you've created can be seen in the "Data" window, if you choose the child data source and open a list of its columns. Among the columns, you will see the relationship with the parent source:
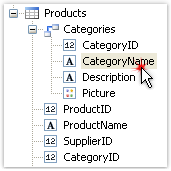
Parent source's data column can be inserted onto the report by using the drag&drop method. So, if we choose the columns shown in the figure, and drag it onto the report page, we will get a "Text" object with the following contents:
[Products.Categories.CategoryName]